

Model Context Protocol (MCP) has matured into a strong ecosystem. MCP servers are now common in tech stacks. They connect LLMs, AI agents with external systems, data sources, and APIs without custom integrations.
In my earlier posts, I covered MCP topics from the basics to OAuth. Here are some of those articles.
This time we will see the complete workflow. We will build the MCP Server, dockerize and deploy it, and finally connect with LLMs and Agents.
This blog covers,
Build MCP Server
Containerize using Docker and Podman
Deploy with Render and Railway
Docker Deployment Vs Direct Deployment
Test with MCP Inspector
Connect MCP Server with LLMs, Agents
1. Build MCP Server
We will start by building a simple MCP Server with the FastMCP framework. An MCP Server has three core features. They are,
Tools
Prompts
Resources
"Tools" are functions that the LLM can call to perform an action. "Prompts" and "Resources" serve different purposes. In our example we will focus only on tools.
Our server has a single tool called "web_extraction". It takes a URL as input and returns the page content. Of course, an MCP server can have multiple tools, each designed for different tasks.
Here’s the code for the Web Extraction MCP Server.
from fastmcp import fastmcp
import requests
from bs4 import BeautifulSoup

mcp = fastmcp("Web Extraction MCP Server")

@mcp.tool
def web_extraction(url: str) -> str:
    response = requests.get(url)
    soup = BeautifulSoup(response.text, "html.parser")
    return soup.get_text(separator='\n')

if __name__ == "__main__":
    mcp.run(transport="http", host="0.0.0.0", port="8000")
The full source code for the Web Extraction MCP server, including the pyproject.toml file, is available in this GitHub repo.
You don’t always need to build an MCP server from scratch. Many servers are already available in the MCP registry for common tools and use cases. If you find one that fits your needs, you can simply change the server code from STDIO to a streamable HTTP server by using
mcp.run(transport="http"). Then containerize it and deploy for real time use.
2. Containerize using Docker and Podman
Now let us containerize our MCP server. We will cover both Docker and Podman approaches for containerization.
Containerization bundles the app with everything it needs to run. This fixes the "it works on my machine" problem. With this approach, MCP server will run the same across local development, staging, and production environments.
Using Docker
Step 1. Create the Dockerfile
First, we need to create a Dockerfile that defines our container environment:
FROM python:3.11-slim

# Set working directory
WORKDIR /app

# Install system dependencies
RUN apt-get update && apt-get install -y \
    gcc \
    && rm -rf /var/lib/apt/lists/*

# Copy requirements files
COPY pyproject.toml ./

# Install Python dependencies
RUN pip install --no-cache-dir -e .

# Copy application code
COPY server.py ./

# Expose the port the app runs on
EXPOSE 8000

# Create a non-root user for security
RUN useradd --create-home --shell /bin/bash app \
    && chown -R app:app /app
USER app

# Run the application
CMD ["python", "server.py"]
Step 2. Build the Docker image from the Dockerfile
docker build -t web-extractor-mcp-server .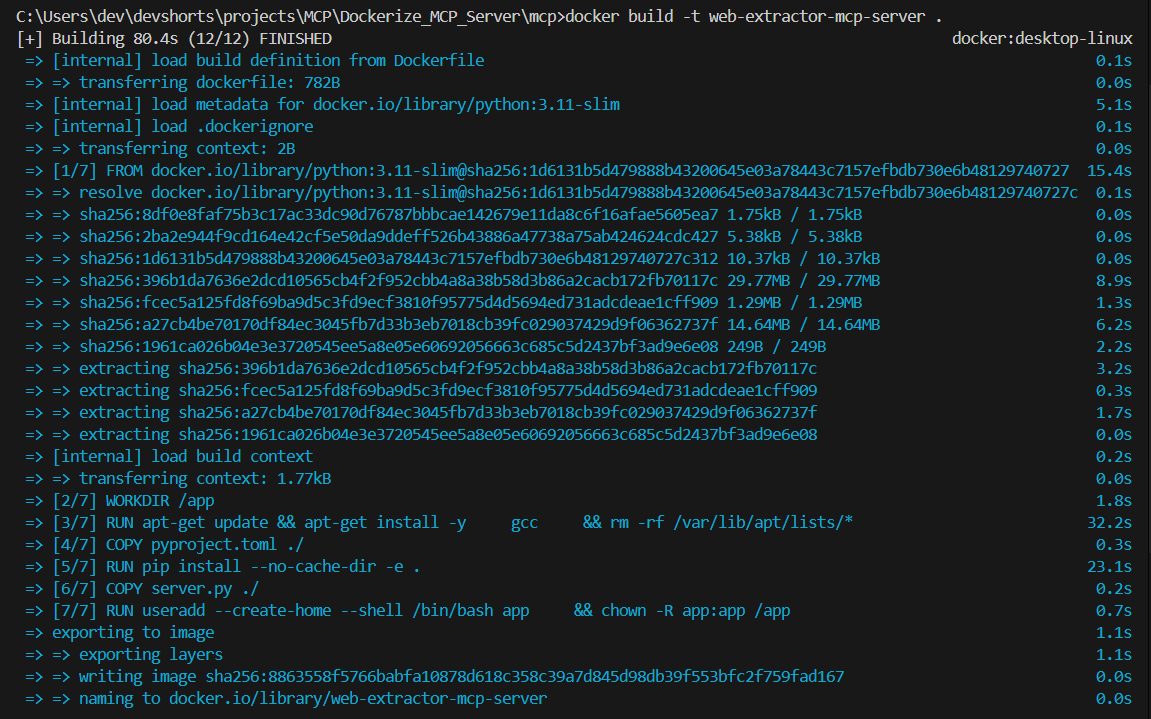
Step 3. Tag the image for the registry
docker tag web-extractor-mcp-server your-dockerhub-username/web-extractor-mcp-server:latestStep 4. Authenticate with Docker Hub
docker loginStep 5. Push the image to Docker Hub
docker push your-dockerhub-username/web-extractor-mcp-server:latest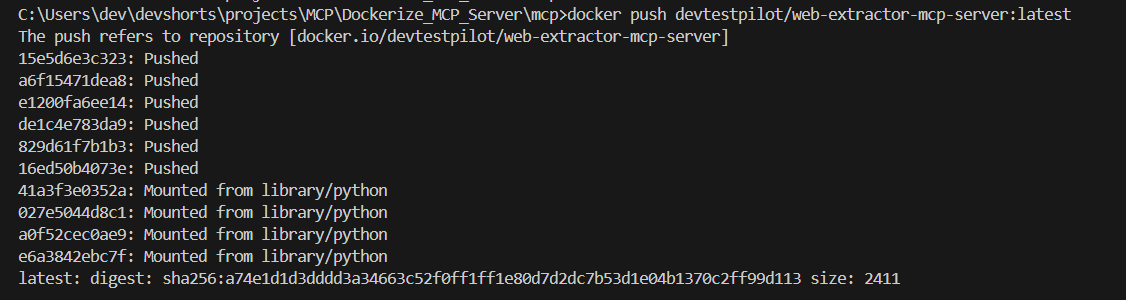
Using Podman
We can also containerize using Podman. It is a container engine that runs without a background daemon. It supports rootless containers, offering better security by default.
Step 1. Build the image
On some systems, Podman requires sudo unless your user is set up for rootless containers. In my case, the working command was.
sudo podman build -t web-extraction-mcp .Step 2. Verify image was created
podman imagesStep 3. Tag for registry
Podman supports multiple registries including Docker Hub and GitHub Container Registry.
sudo podman tag web-extraction-mcp:latest your-dockerhub-username/web-extraction-mcp:latestStep 4. Authenticate with the registry
podman login docker.ioStep 5. Push the image to the registry
sudo podman push your-dockerhub-username/web-extraction-mcp:latestWith Docker images ready, we can now deploy them to various platforms.
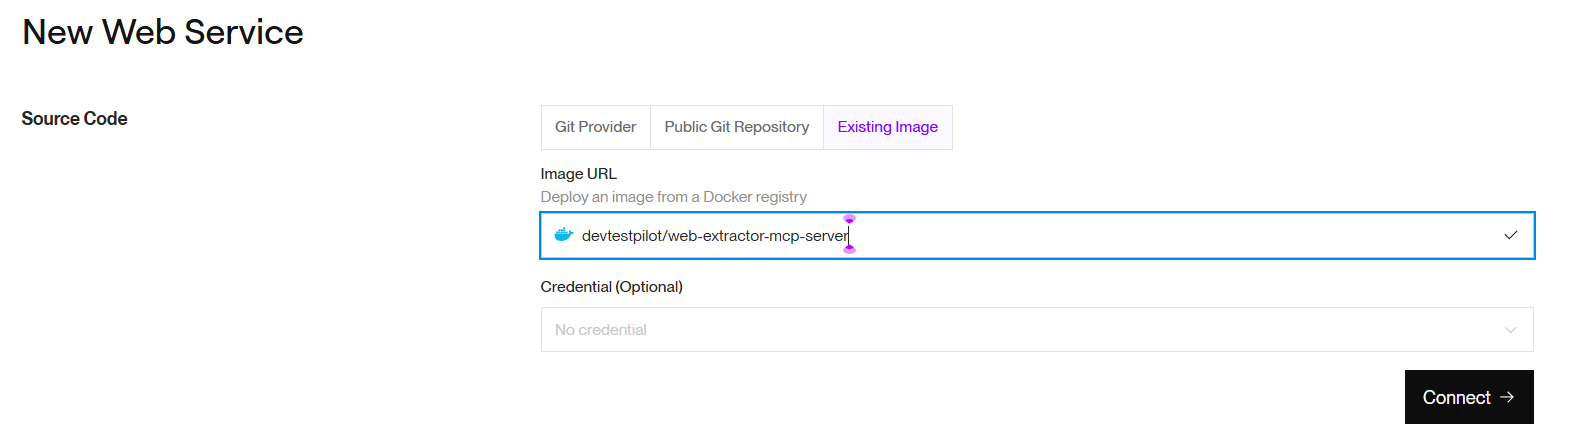
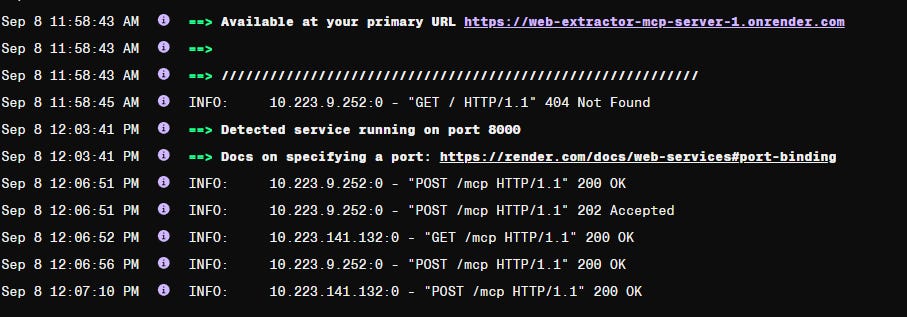
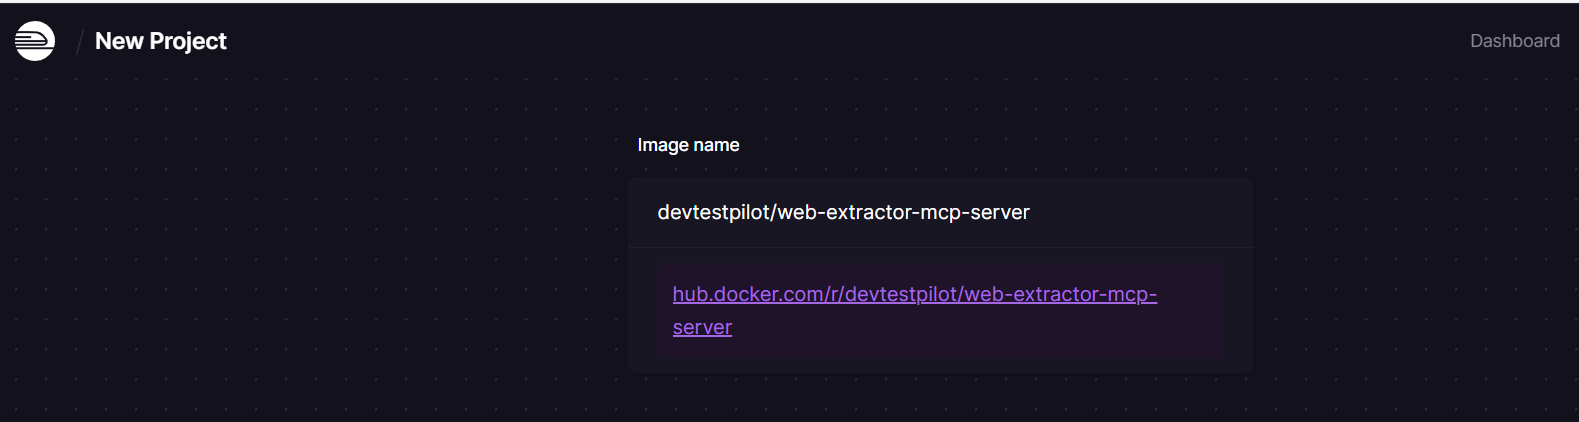
3. Deploy with Render
Let's start with Render first.
Connect the Docker image and deploy as a web service through Render's dashboard. The platform will pull the image and handle the deployment process.
Deploy with Railway
Railway works much like Render. Connect the Docker image and Railway will handle the deployment process automatically.
Now that our MCP server is deployed, before connecting it with LLMs and Agents, let’s look at why Docker deployment is better than direct deployment
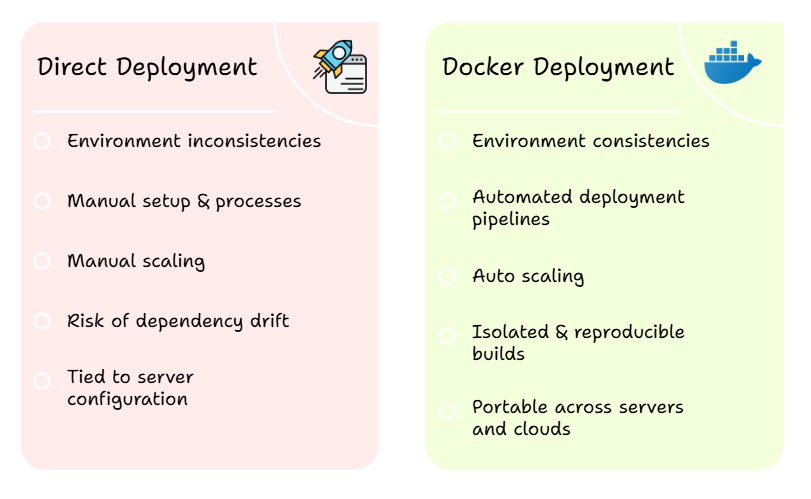
4. Direct Deployment Vs Docker Deployment
Direct deployment can fail when the local and server environments don’t match. Docker solves this by packaging everything, so the MCP server runs the same everywhere.
Here’s a quick comparison between Direct deployment and Docker deployment.
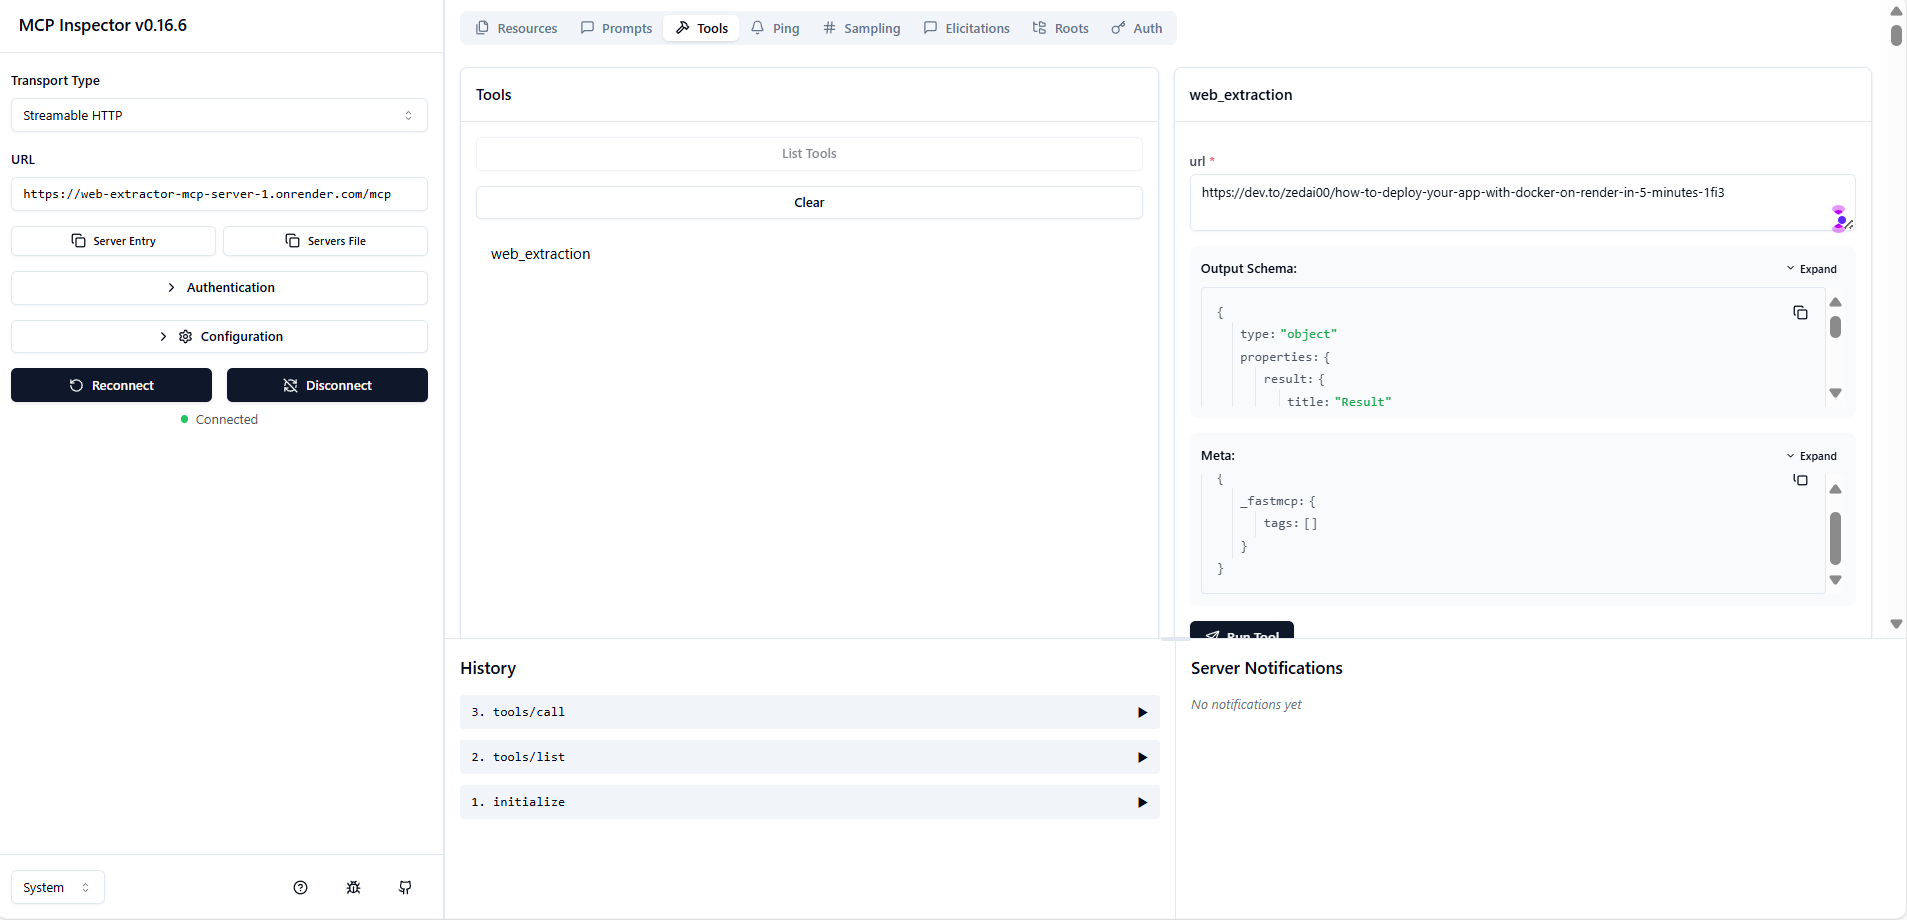
5. Test with MCP Inspector
MCP Inspector is the standard tool for testing and debugging MCP servers. It provides a user interface to interact with the server's tools and verify functionality.
Run
npx @modelcontextprotocol/inspectorOpen MCP Inspector.
Enter MCP Server deployment URL with /mcp at the end.
Click "Connect" to establish the connection.
Once connected, we can see the list of tools our MCP Server provides.
In our case, after we connect with our deployment url, our web_extraction tool shows up in the list. This proves our deployed MCP server is working properly.
6. Connect MCP Server with LLMs, Agents
MCP Servers become really useful when you connect them with LLM-powered apps and agents. In this section, we will see how to connect them with LLMs Agents, and code editors.
6.1 Connect MCP Server with Anthropic API
To connect with an MCP server you normally need an MCP client, but some providers now let their LLMs talk to MCP servers directly through their APIs.
Here’s an example of connecting an MCP server with the Anthropic API. You can see Anthropic’s docs for more details
import anthropic

client = anthropic.Anthropic()

response = client.beta.messages.create(
    model="claude-sonnet-4-20250514",
    max_tokens=1000,
    messages=[{
        "role": "user",
        "content": "What tools do you have available?"
    }],
    mcp_servers=[{
        "type": "url",
        "url": "https://mcp.example.com/sse",
        "name": "example-mcp",
        "authorization_token": "YOUR_TOKEN"
    }],
    betas=["mcp-client-2025-04-04"]
)
6.2 Connect MCP Server with OpenAI Agent
OpenAI’s Agent supports MCP servers. The table below shows the different MCP integration options supported by the OpenAI Agent Python SDK.
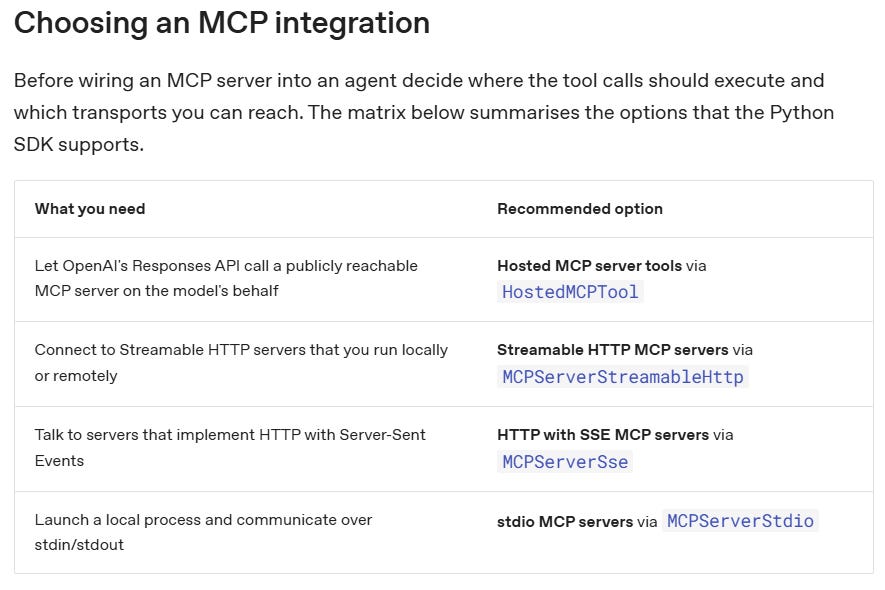
You can read more about these options in the OpenAI MCP docs.
For example, here’s how an OpenAI Agent connects with a Streamable HTTP MCP server.
import asyncio
import os

from agents import Agent, Runner
from agents.mcp import MCPServerStreamableHttp
from agents.model_settings import ModelSettings

async def main() -> None:
    token = os.environ["MCP_SERVER_TOKEN"]
    async with MCPServerStreamableHttp(
        name="Streamable HTTP Python Server",
        params={
            "url": "http://localhost:8000/mcp", # URL of the MCP server
            "headers": {"Authorization": f"Bearer {token}"},
            "timeout": 10,
        },
        cache_tools_list=True,
        max_retry_attempts=3,
    ) as server:
        agent = Agent(
            name="Assistant",
            instructions="Use the MCP tools to answer the questions.",
            mcp_servers=[server],
            model_settings=ModelSettings(tool_choice="required"),
        )

        result = await Runner.run(agent, "Add 7 and 22.")
        print(result.final_output)

asyncio.run(main())
6.3 Connect MCP Server with Claude Code
We can also add MCP Server with Claude Code.
claude mcp add --transport http web-extractor-mcp https://web-extractor-mcp-server-1.onrender.com 
Running this command connects the MCP server to Claude Code.
6.4 Connect MCP Server with Code Editors
Cursor Code Editor provides three ways to connect with MCP servers, so your tools can be accessed directly while coding.
VS Code also provides multiple options to add MCP servers, including workspace-level, user-level, and dev container configurations:
Windsurf supports MCP through Cascade, so you can plug in your servers and use their tools directly in the editor.
Zed also has MCP integration, letting you add servers in its config and access MCP tools while coding.
LangChain provides MCP adapters, allowing you to use MCP servers inside your workflows and agents.
LlamaIndex supports MCP, so you can use MCP servers as tools in your pipelines and agents.
Some websites like MCP Server Org provide one-click MCP Server installation options for VS Code and Cursor. It makes setup faster but ensure the legitimacy of the site before installing. Only add MCP servers from trusted publishers and review their configuration carefully.
6.5. Connect Any LLM with Any MCP
mcp-use is an open-source toolkit that connects any LLM to any MCP server, so you can build agents with tool access without relying on closed clients.
MCPHost is a CLI host application that connects LLMs with MCP servers. It supports multiple providers like Claude, OpenAI, Gemini, and Ollama.
6.6 Connect MCP Server with ChatGPT
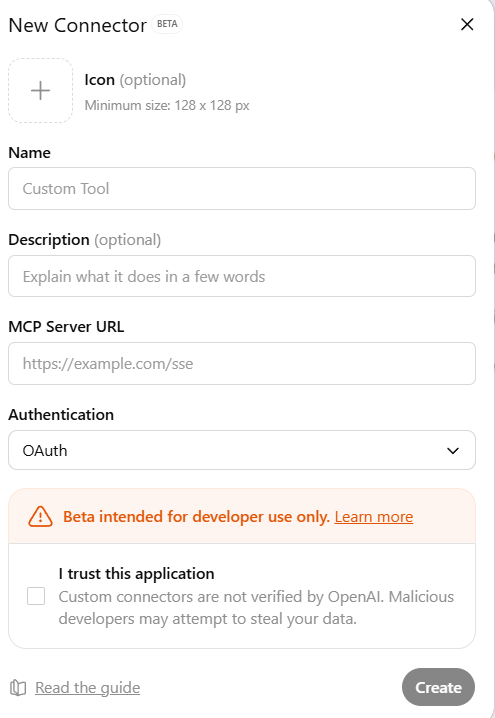
OpenAI recently added support for MCP Server in ChatGPT. This means you can integrate your own custom MCP servers directly into ChatGPT and use their tools inside conversations.
To set it up, enable Developer Mode under Advanced Settings. Then create a Connector. From there, you can fill in the details of your MCP server (name, description, and URL).
6.7 Connect MCP Server with Claude Desktop
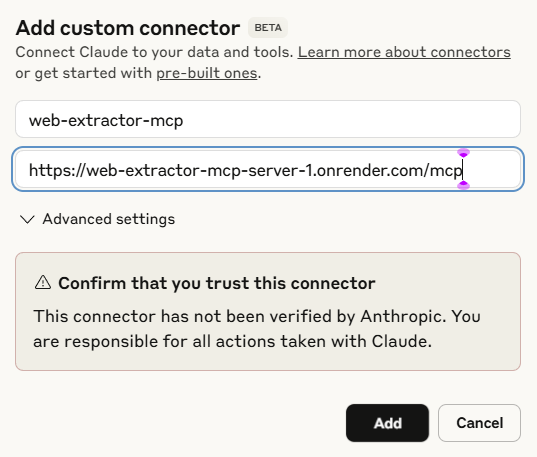
We can connect MCP Server with Claude Desktop in two ways:
Through the UI (paid users only)
Open Claude Desktop Settings → Connectors → Add Custom Connector.
Enter MCP server’s deployment URL and save the configuration.
Through claude_desktop_config.json (all users)
Open the configuration file:
claude_desktop_config.json.Add a new entry for MCP server with the deployment URL.
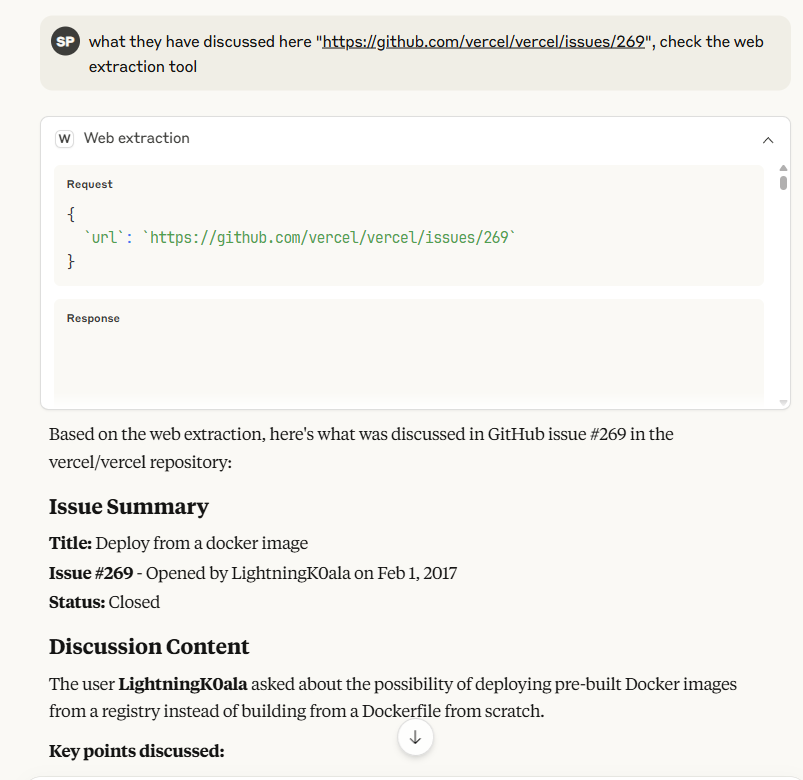
Let us now try connecting our Web Extraction MCP Server with Claude Desktop.
Once connected, our web extraction tool is available directly within Claude Desktop. We can now ask Claude to extract content from any webpage, and it will use MCP server’s tool to perform the task.
Conclusion:
In this guide, we explored the full journey of MCP servers. We built a simple MCP server, then containerized, deployed, and connected it with LLMs, agents, and editors.
MCP opens the door to building powerful agents with tool access without the friction of custom integrations.
Give MCP servers a try, and happy learning!