
OpenAI AgentKit : How to build AI Agents in Minutes
A step-by-step guide to building AI agents using AgentKit

AI agents are becoming more popular. Sooner or later every web application will have an agent running inside.
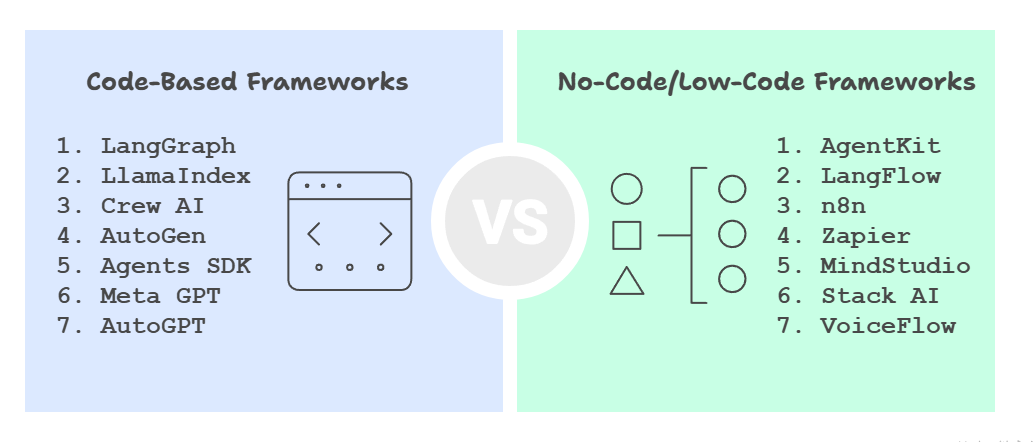
As a result, many new agent frameworks are appearing. Some frameworks are code-based. You write code to build agents. LangGraph, CrewAI, AutoGen are some of the code-based frameworks.
Some are no-code frameworks. These let you drag and drop components to create agentic workflows. Frameworks like n8n and LangFlow work this way.
OpenAI recently released one of these no-code frameworks at their Dev Day 2025. It’s called AgentKit.
In this blog we will explore AgentKit and build a real agent with it. We will cover,
Agent Frameworks
Code vs No-Code Frameworks
What is Agent Kit
How to build an agent using AgentKit
Choosing the Right Agent Framework
1. Agent Frameworks
Agent frameworks help us build AI agents faster by providing useful tools and services.
Agent frameworks fall into two categories.
Code based frameworks give us packages and libraries to build agents directly in code. They offer full control and deep customization. They require more time to learn and build with, but they can handle complex logic.
No code frameworks provide visual tools where we drag and drop blocks to create the workflow. They are faster to begin with, and we can build agents in minutes. They offer less control for advanced logic, but they are great for quick automation.
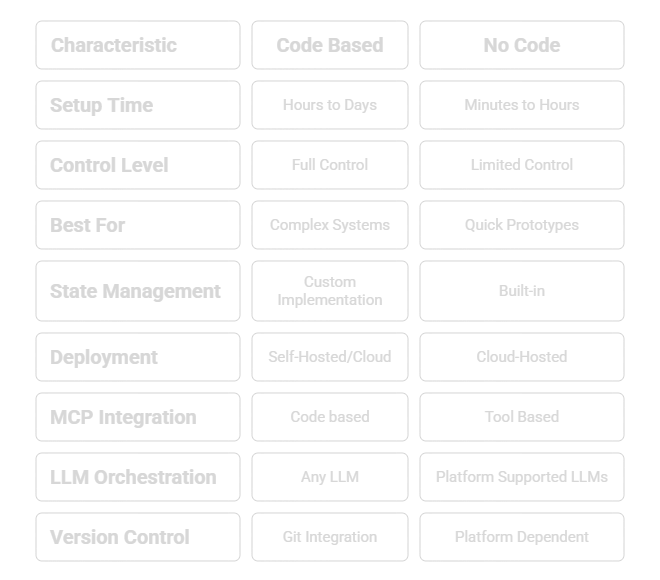
2. Code vs No-Code Frameworks
Each approach has its own strengths. The table below breaks down how they compare across setup time, control level, deployment, and more.
3. What is Agent Kit
AgentKit is one of the no code frameworks. AgentKit comes with four main components.
Connector Registry

Agent Builder:
It is a visual canvas. You can drag and drop nodes to build your agent. No coding needed for workflows. You can also export the workflow as code if you want to customize it later.
ChatKit:
It is an embeddable chat interface. Instead of building your own chat UI, you can use ChatKit to test the agentic workflow.
Connector Registry:
Connector Registry consists of tools you can connect with agents. There are some built-in tools like Google Drive, Dropbox, and SharePoint.
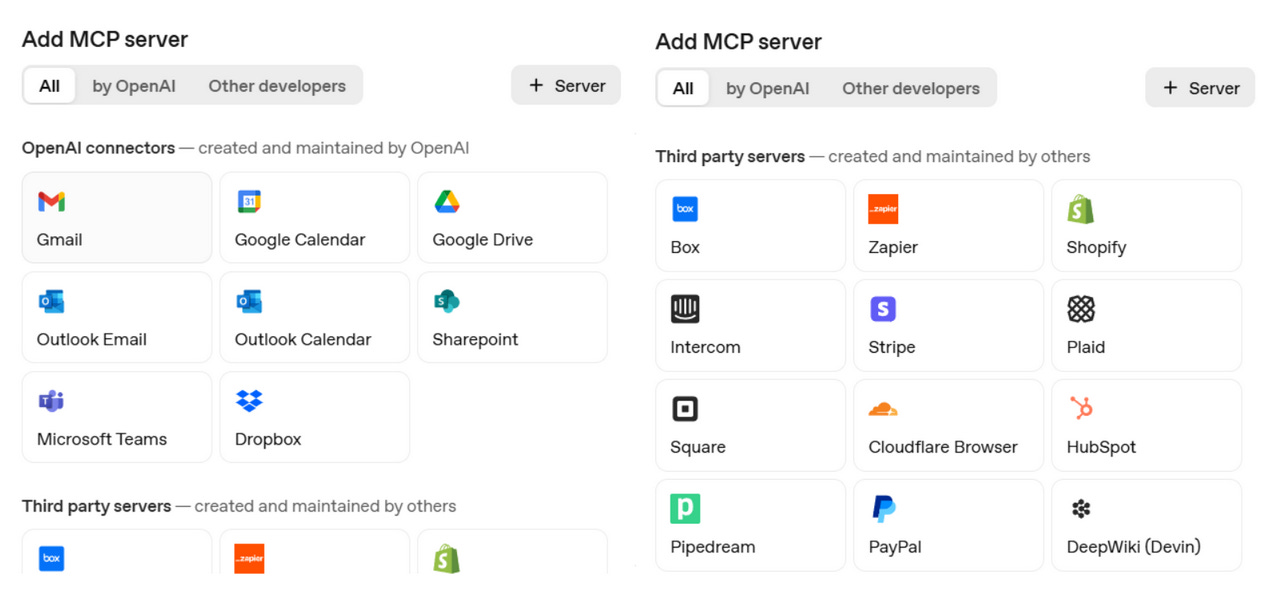
If a tool is not available in the registry, you can connect it through MCP (Model Context Protocol) servers.
Evals for Agents:
It is used to evaluate Agent Performance across many examples.

4. How to build an agent using AgentKit
Let us build a simple agent using AgentKit. The agent reads a GitHub repo and deploys it to Render, Vercel, or Railway based on what the user asks.
Here are the steps to build it,
Step 1: Create the Workflow in the Agent Builder
Open Agent Builder and create a new workflow. You get a blank canvas with visual nodes. Drag and drop to start shaping the decision flow.
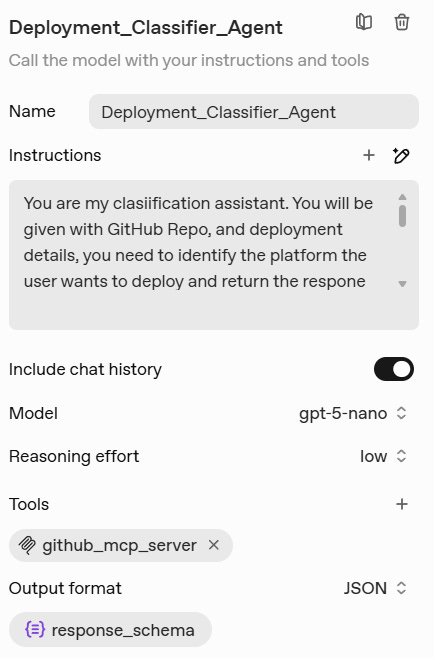
Step 2: Add the Deployment Classifier Agent
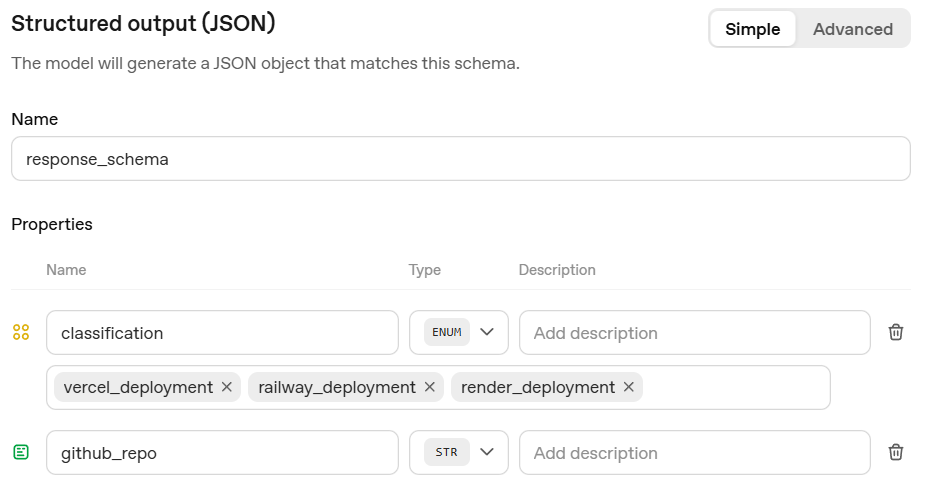
The workflow starts with a Start node. Add an Agent node next to it and name it Deployment Classifier Agent. This agent reads the user input and classifies the deployment target. It returns a JSON with two fields, the GitHub repo and the target platform. Here is the configuration.
Below is my response schema
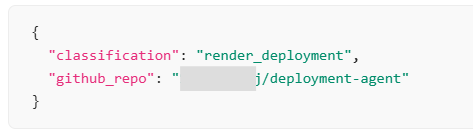
Here is a sample output from the Deployment Classifier Agent when the user says “deploy this github repo in render”.
You can also add guardrails in the workflow. AgentKit supports PII checks, moderation, jailbreak detection, and hallucination filtering.
Step 3: Add an If / else Node for Decision Making
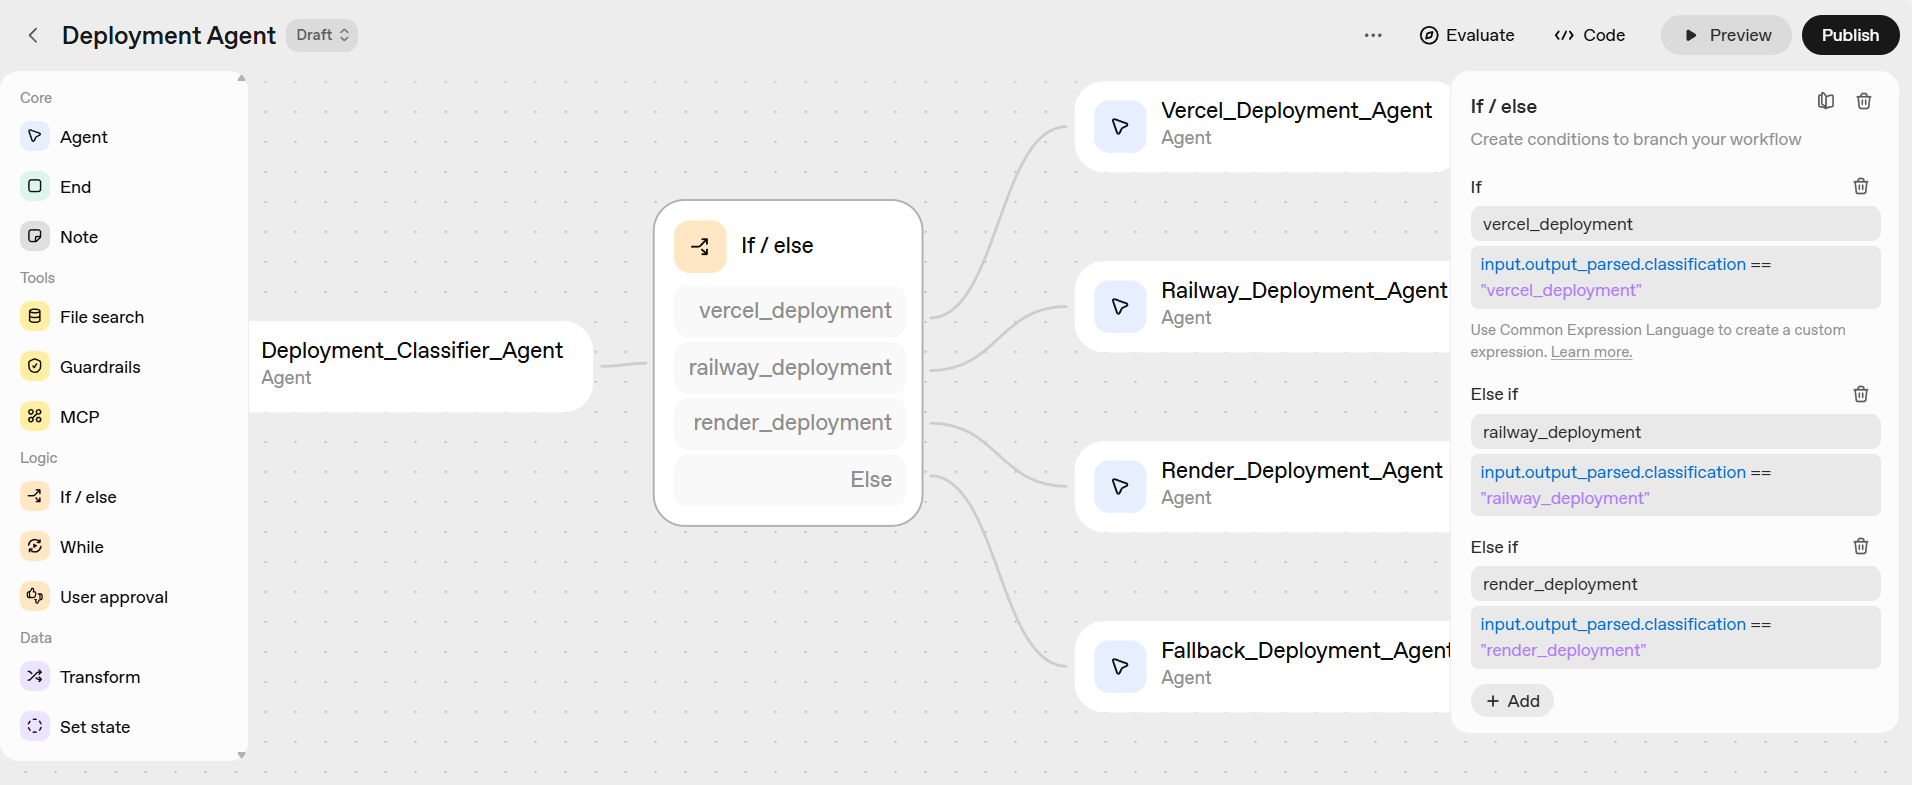
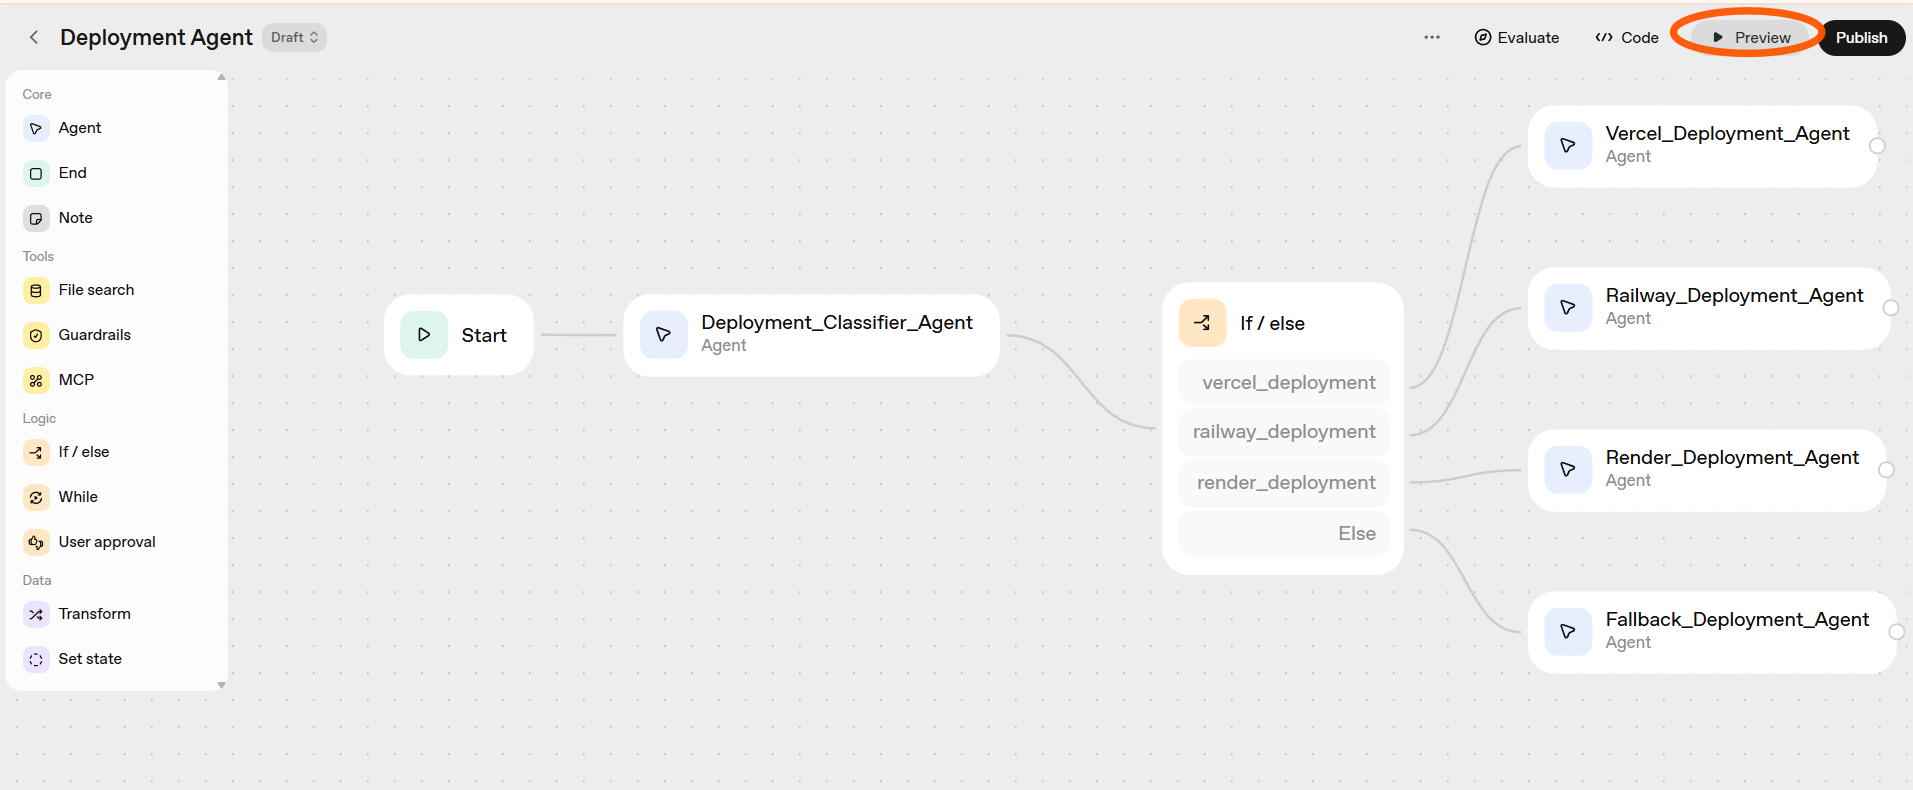
Now add an If / else node after the Deployment Classifier Agent. This node checks the output from the classifier. Based on the classification value, it sends the flow to the correct deployment agent.
If the classification value from the classifier agent is,
vercel_deployment → Connect to Vercel Deployment Agent
render_deployment → Connect to Render Deployment Agent
railway_deployment→ Connect to Railway Deployment Agent
None of the above → Connect to Fallback Deployment Agent
This creates a clean decision tree where every path leads to a specific action.
Below is how the If / else node is configured and connected.
Step 4: Configure Each Deployment Agent
After the If / else node, create separate agents for every case and connect them to the correct branch.
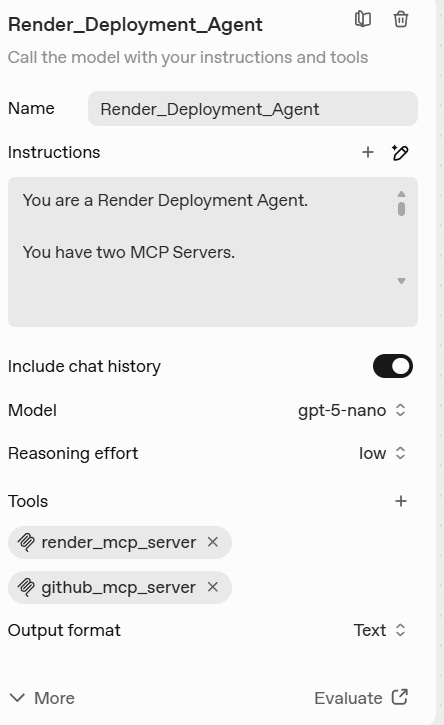
Each deployment agent has its own MCP server connection. We also use the GitHub MCP server to read project files.
Vercel Deployment Agent connects to the Vercel MCP server to create deployments.
Railway Deployment Agent connects to the Railway MCP server to trigger deployments in Railway.
Render Deployment Agent connects to the Render MCP server to deploy applications.
Fallback Deployment Agent responds when the platform is missing or not supported and guides the user with valid options.
Here is the sample configuration for the Render Deployment Agent. Remember to add detailed instructions for every agent to perform tasks.
Once the workflow is ready, we can test it using the built in chat interface. Click Preview and send a real input to see how the agent responds.
Below you can see a test in action using ChatKit.
Step 5: Test and Deploy
Now test the workflow using a real repo.
I asked the agent to deploy a repo to Render.
The Deployment Classifier Agent identified it as a Render deployment. Then the If / Else node routed the flow to the Render Deployment Agent. The Render agent read the project files through the GitHub MCP server. It asked the required questions and deployed the app using the Render MCP server.
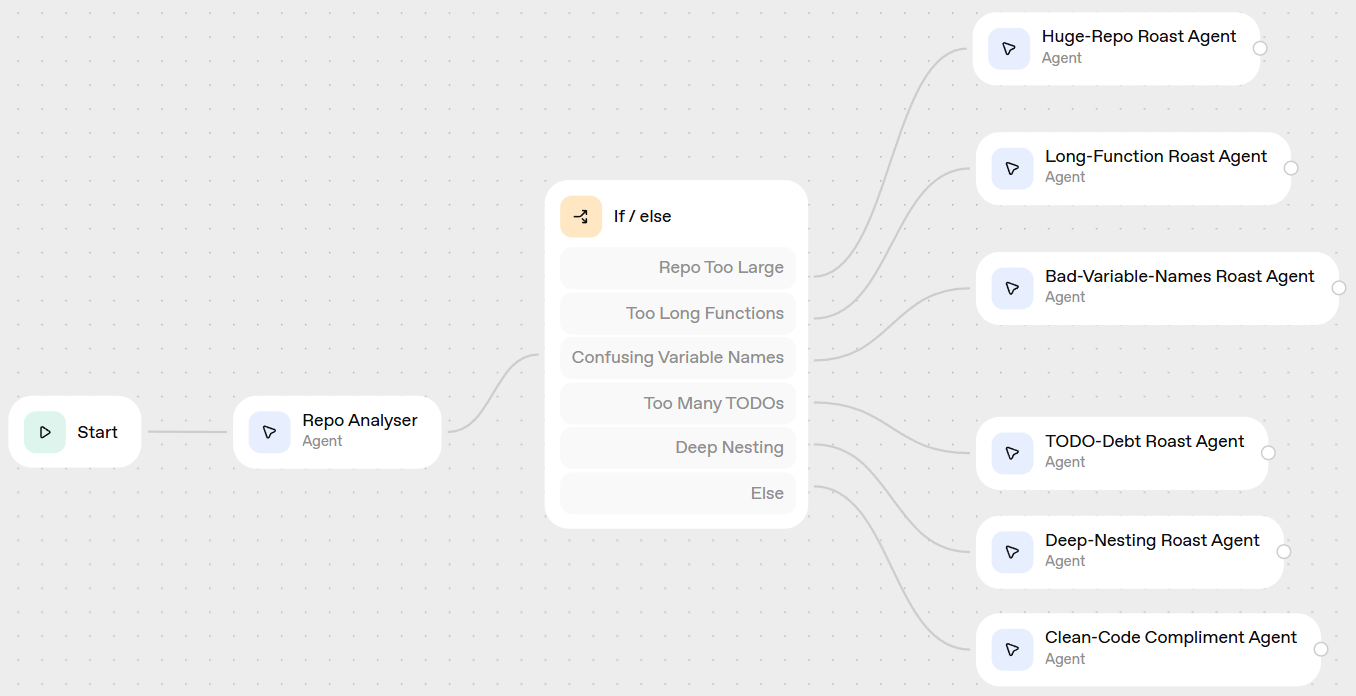
I also built a Code Roaster Agent to test more features. It checks a GitHub repo, finds code smells, and gives a fun roast with quick fix ideas.
Here is the workflow. The Repo Analyser Agent detects code issues and the If Else node routes it to the correct roast agent.
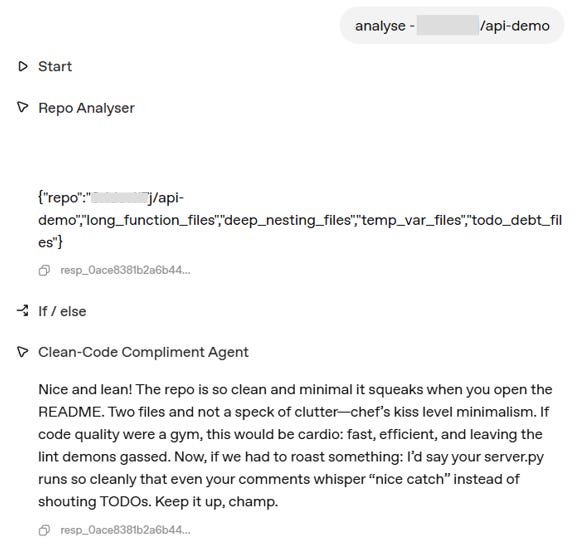
When I tested it with a small clear script, it actually complimented me for clean code. Looks like the clean code compliment agent has done its duty.
That is how we build agents in AgentKit. Simple and fast. Now let us compare code based and no code frameworks.
5. Choosing the Right Agent Framework
Choose LangGraph when you want complex multi agent workflows with full control and state handling.
Choose AutoGen when you need flexible research style agents that work together and improve with feedback.
Choose CrewAI when you build production systems with defined roles and task delegation across teams.
Choose AgentKit when you want fast visual workflows and easy tool integration inside your application.
Choose n8n when business automation and many ready connectors are your main focus.
Choose LangFlow when you want to visually prototype agent flows and test ideas quickly.
Conclusion
We started with agent frameworks and understood code based and no code approaches. We explored AgentKit and built a working agent step by step, so you now know how to use it.
Pick a real problem and try it yourself, this is the right time to ship your first agent.
Happy Building!