
How to build a Full Stack Application using AI Agents
Product Ideation - Planning - Coding - Code Review -Testing - Deployment

I have built many applications with the help of AI. But one question kept popping up in my mind.
Can we really use AI at every stage of product development, from ideation to deployment, and still ship a full-stack app that actually works?
To figure this out in detail, I decided to take a hands-on approach. I built a complete full stack app using AI tools. This blog walks through how I built it from end to end and highlights the tools I used at each stage.
Here are the stages I followed and the tools I used at each step.
Product ideation - with O3
Requirements planning - with Traycer AI & Task Master AI
Code implementation - with Claude Code
Code review - with CodeRabbit
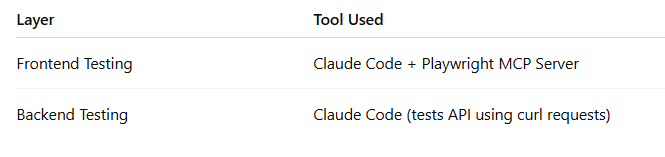
Testing - using Claude Code and MCP Servers
Deployment - using Claude Code and MCP Servers
If you’d like to read more posts on building with AI, you can subscribe below.
Product Development Stages
When building this full stack app, I divided the product development process into clear stages. Everything started with the idea and moved step by step until deployment. Here are the stages I followed.
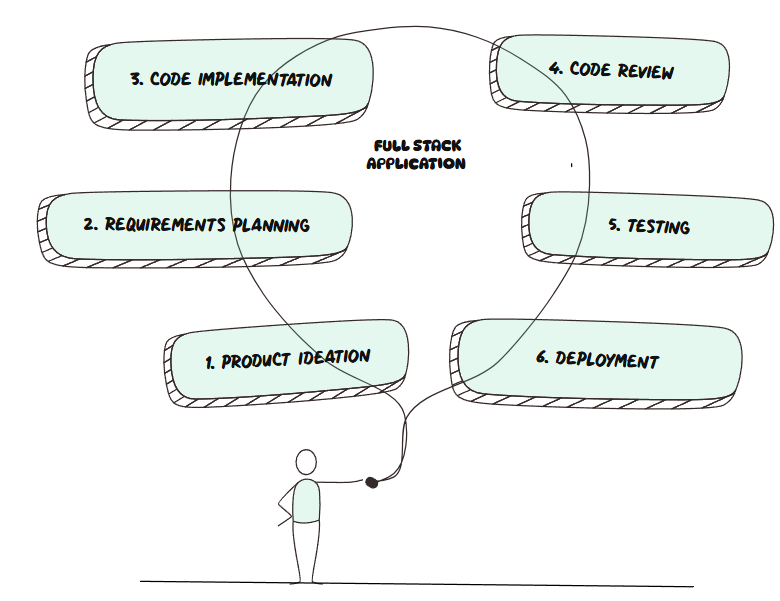
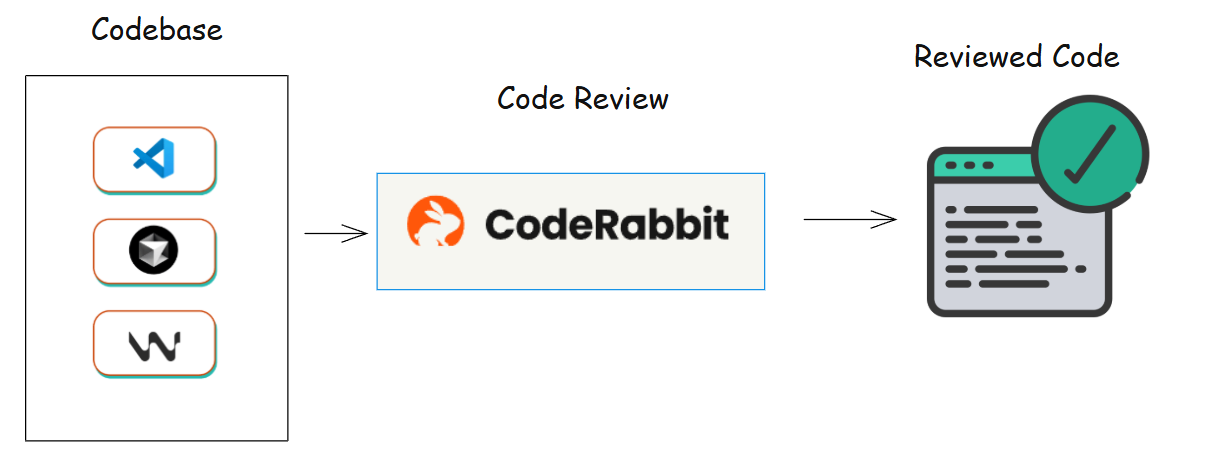
The next diagram shows which AI Tool I used, from product ideation to deployment.

1. The Product Ideation:
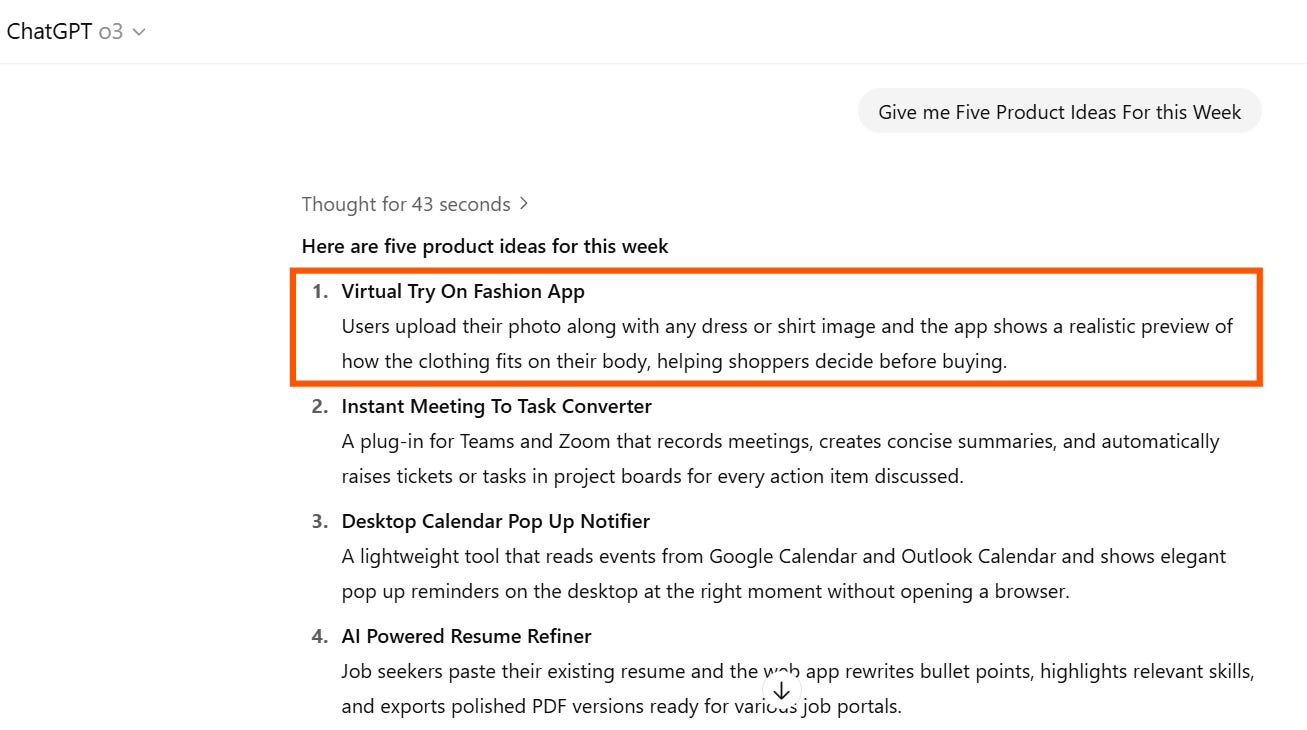
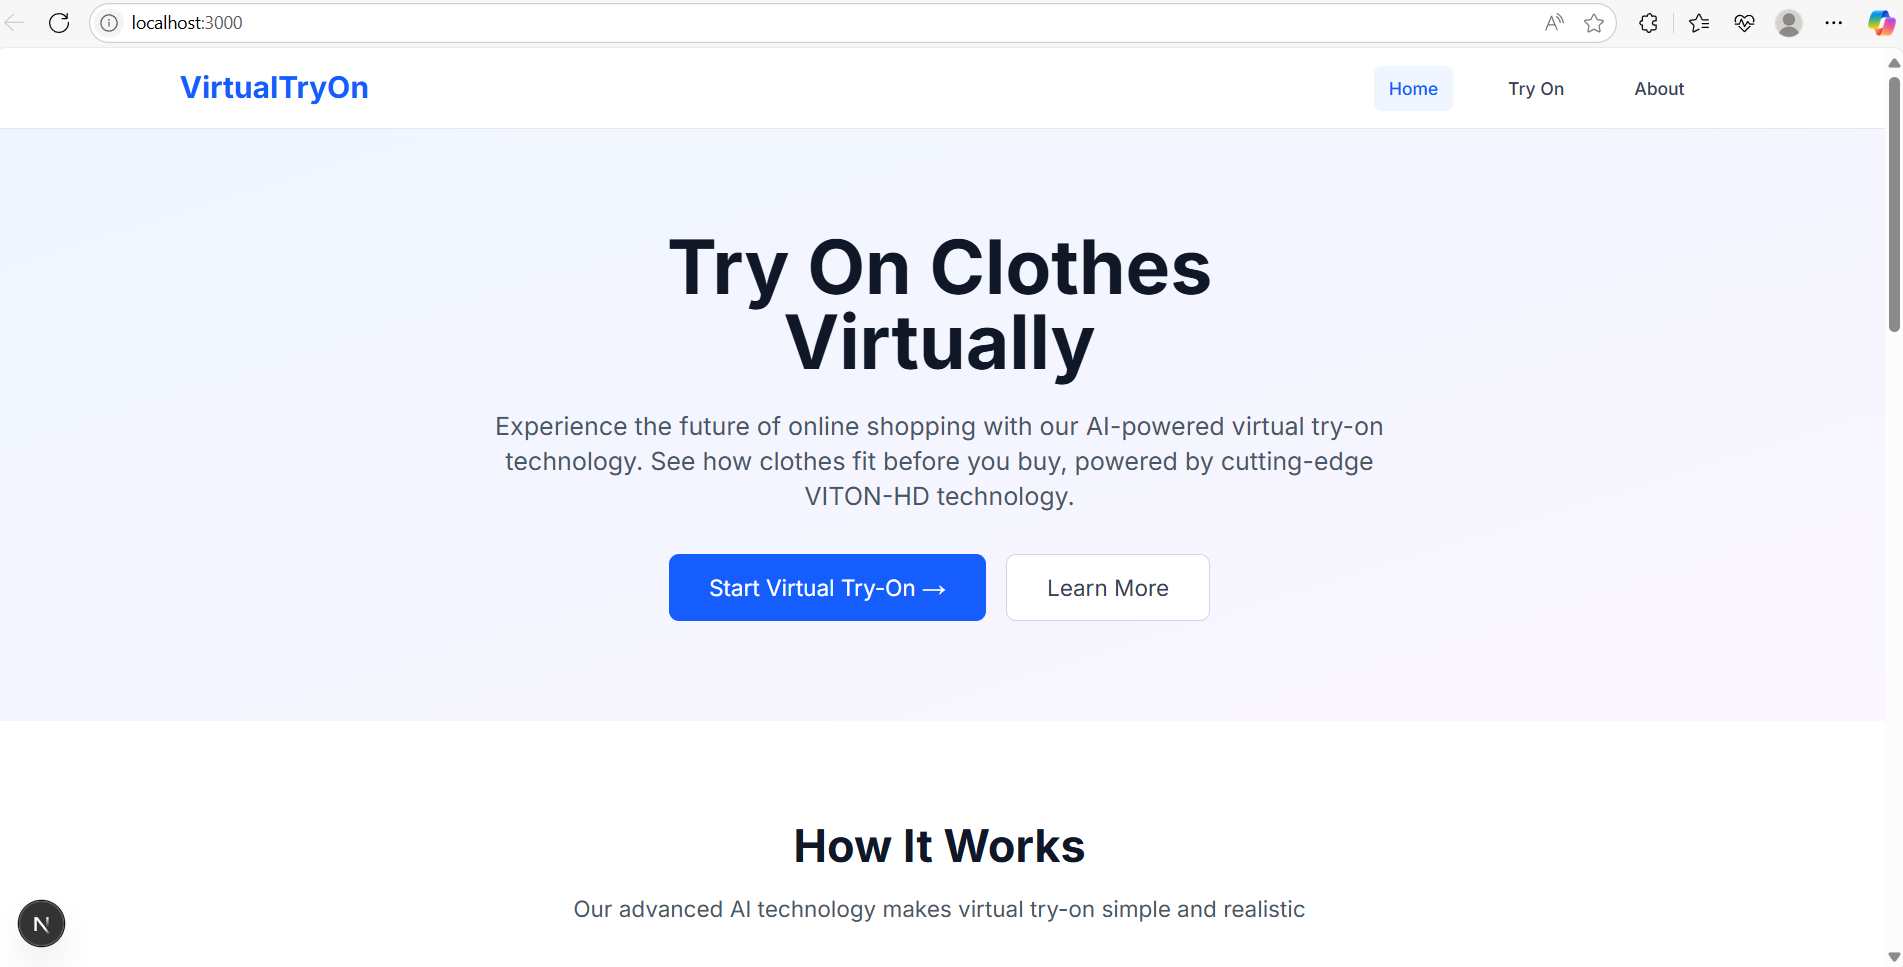
For product ideation, I asked o3 to suggest some ideas. o3 is a reasoning model from OpenAI. I gave a short prompt asking for product ideas and it returned a list of ideas. I picked the one that felt interesting to me. It was called Virtual Try on App.
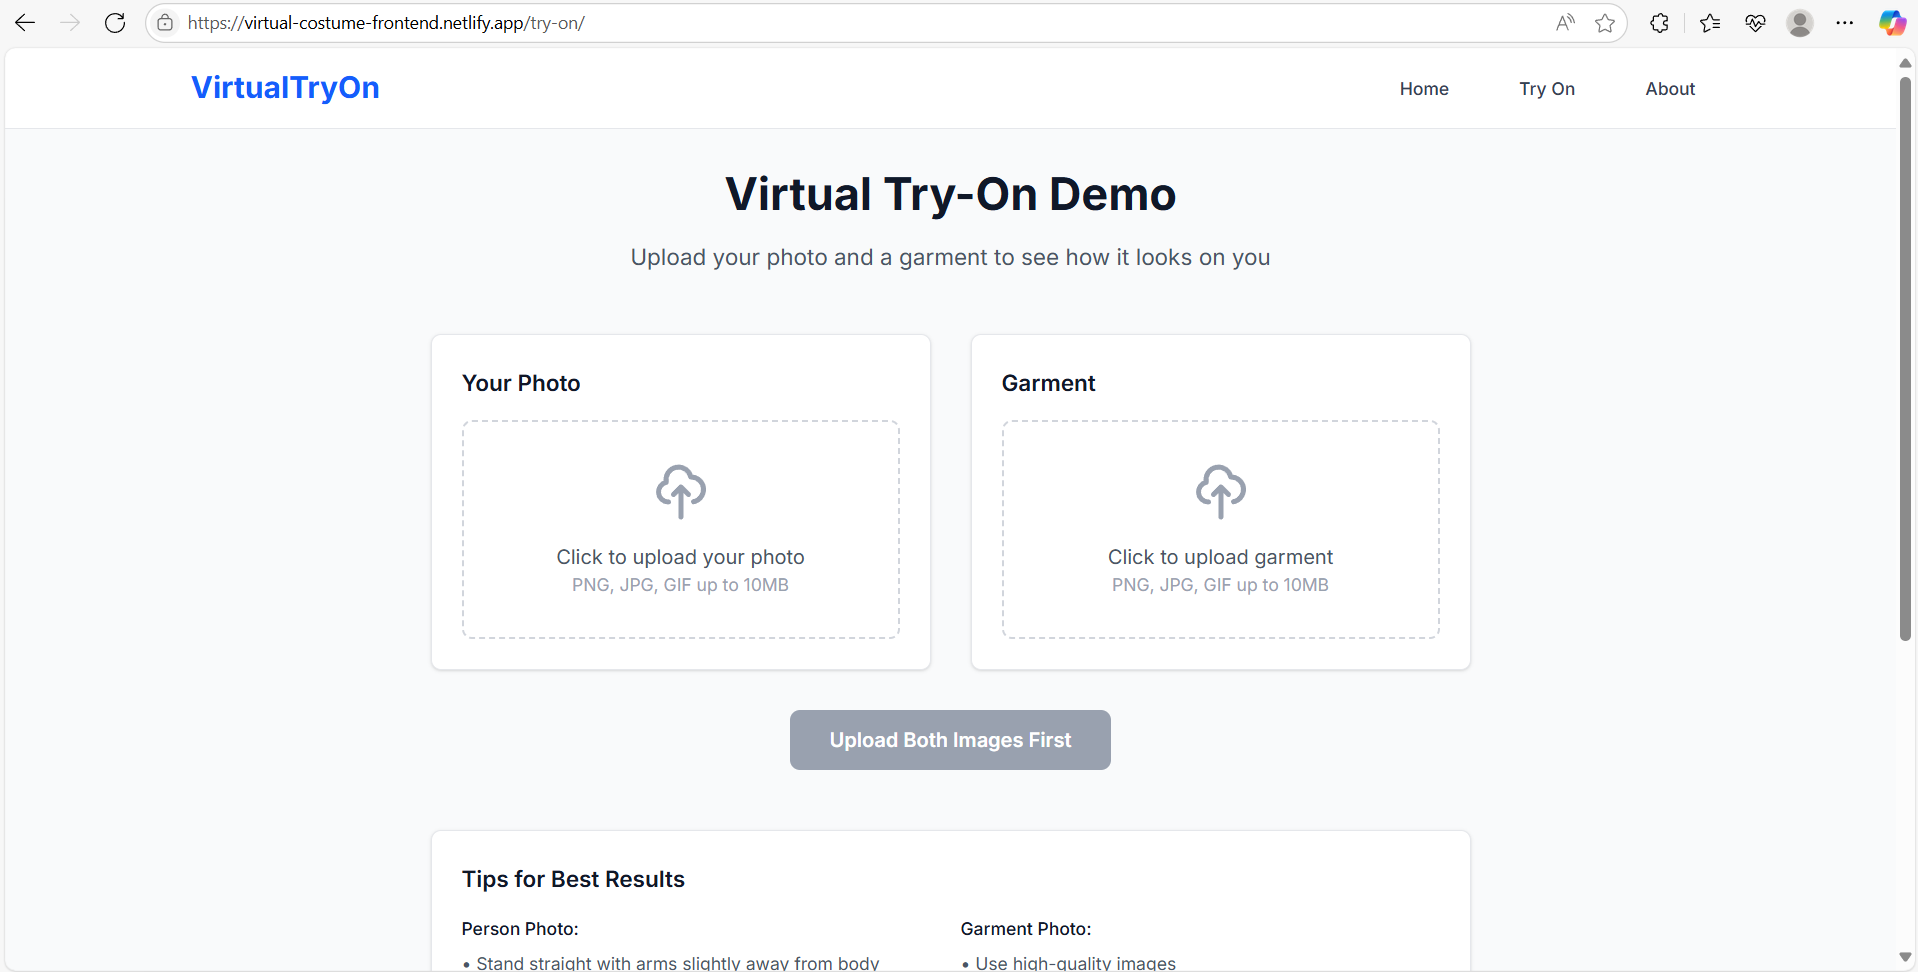
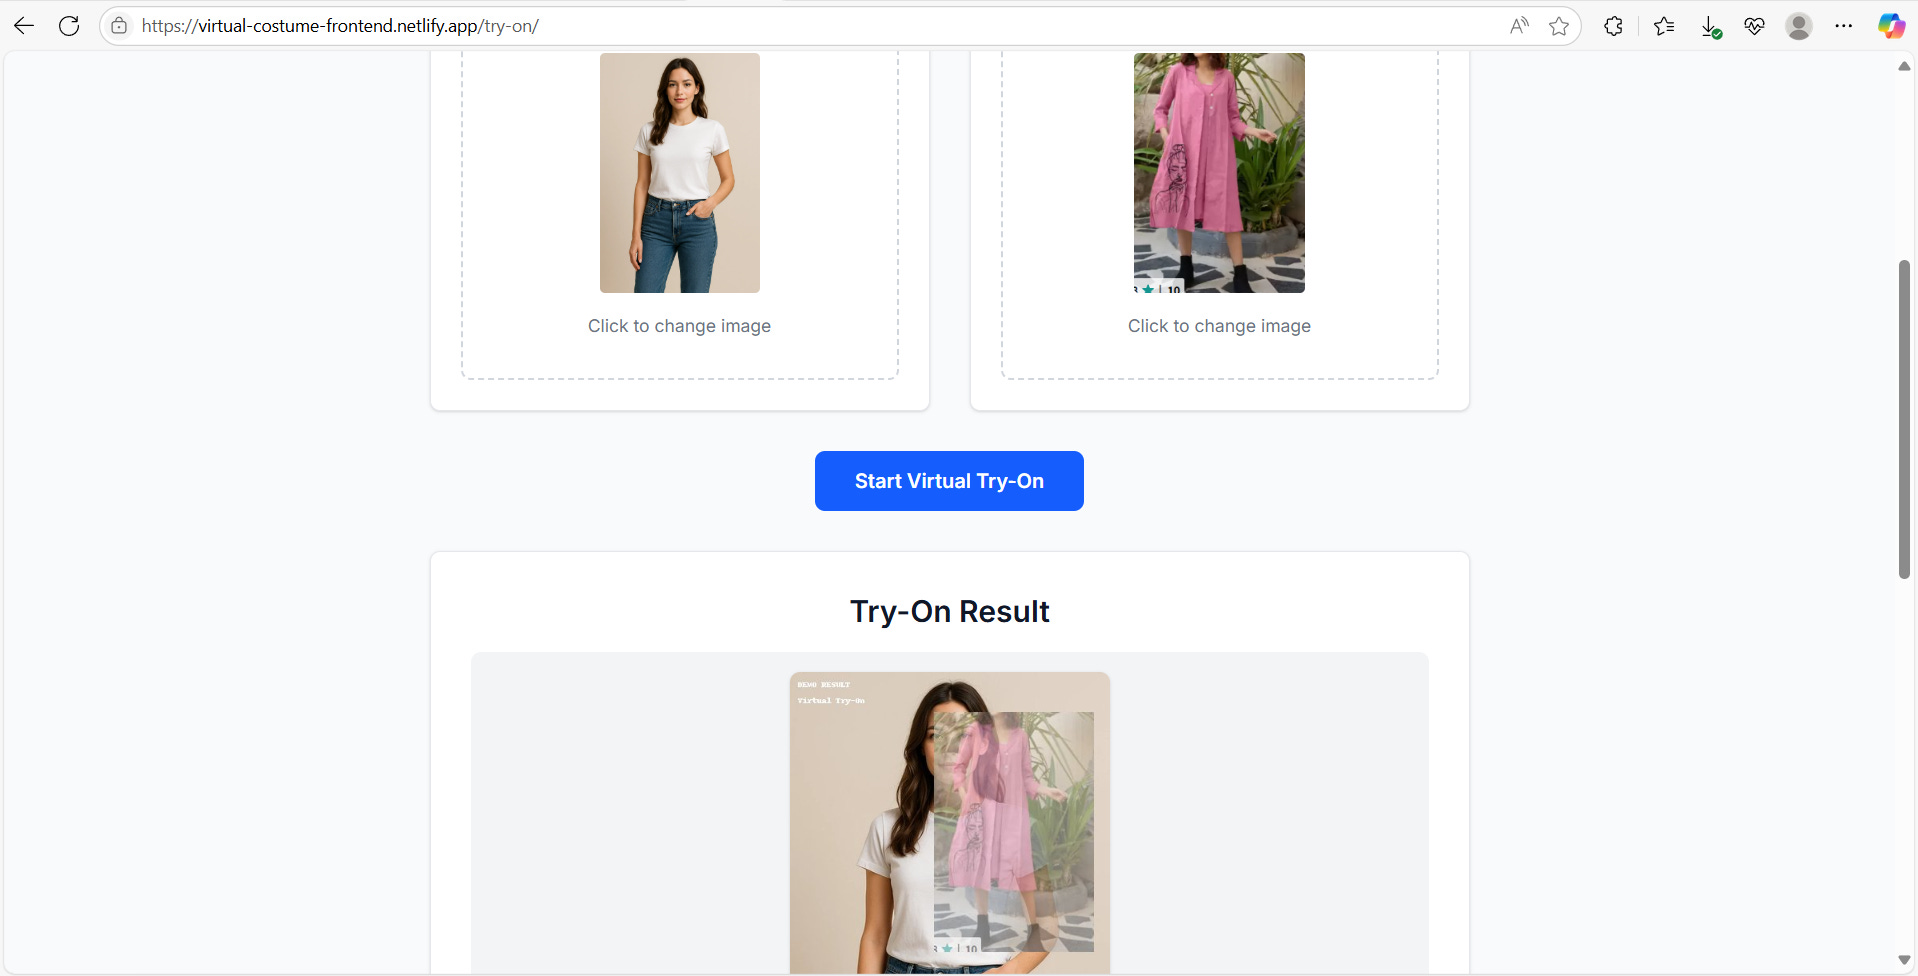
Here’s what the app will do. Users upload their photo and a dress image. The app shows how the outfit looks on their body. It helps them decide before buying.
I liked this idea because it’s visual and interactive. It needed a good frontend to handle the image uploads and solid backend to process the images.
This app was a good use case for me to test how well AI agents can build a real full stack application.
2. Preparing PRD and Plan
The next step was preparing the Product Requirements Document (PRD) and Technical Plan Document.
Think of the PRD as the blueprint for the product. It defines what you are building and why. It outlines the core features, constraints, and assumptions. Basically, it serves as a high-level document that explains the product.
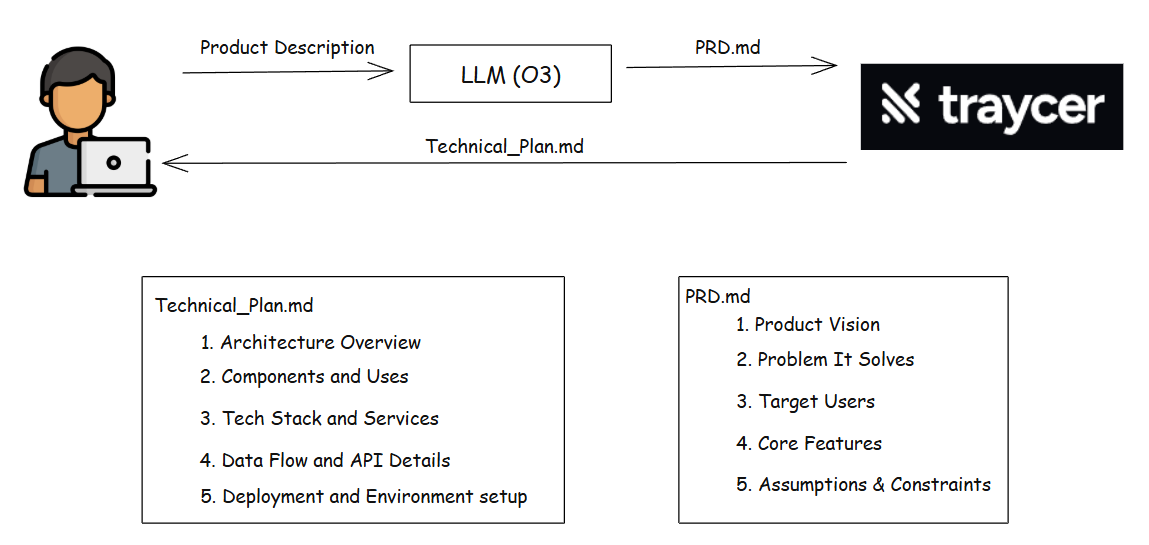
I gave the product description to O3 and asked it to prepare PRD.md.
Plan with Traycer
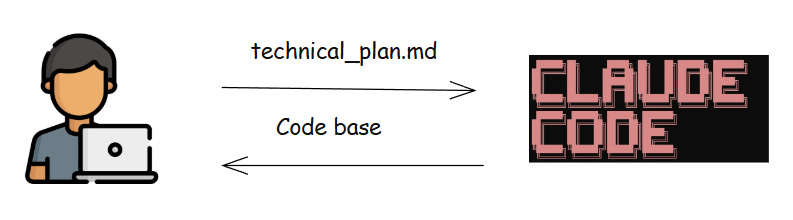
Once PRD was clear, I gave it to Traycer AI, and asked it to generate technical_plan.md
Plan with Traycer, and Tasks with TaskMaster
After creating the technical plan, there's another option I explored: TaskMaster AI. I tested giving that plan to TaskMaster, and it generated a detailed task breakdown. While I didn't follow this task-by-task approach for this blog, it's worth noting as an alternative workflow. I'll cover TaskMaster in a separate post.
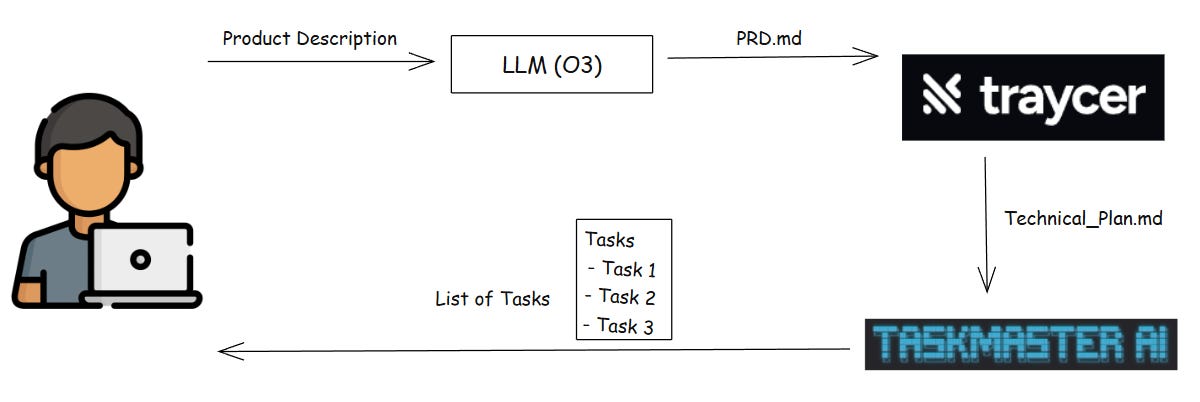
Here is a glimpse of the tasks generated by TaskMaster AI. Each task had an ID, title, description, priority, test strategy, and step-by-step instructions.
These tasks could be completed by the TaskMaster Agent itself or passed to Claude Code or any terminal agent to build the codebase task by task.

For this experiment, I used the direct Plan with Traycer approach.
I shared a PRD with Traycer, and it gave me a detailed technical_plan.md covering the system overview, architecture, and approach.
Here were the kinds of details Traycer included in the Technical Plan,
Tech stack and framework selection
End-to-end data flow
Service communication diagrams
Environment setup
Testing strategy
Deployment and monitoring plan
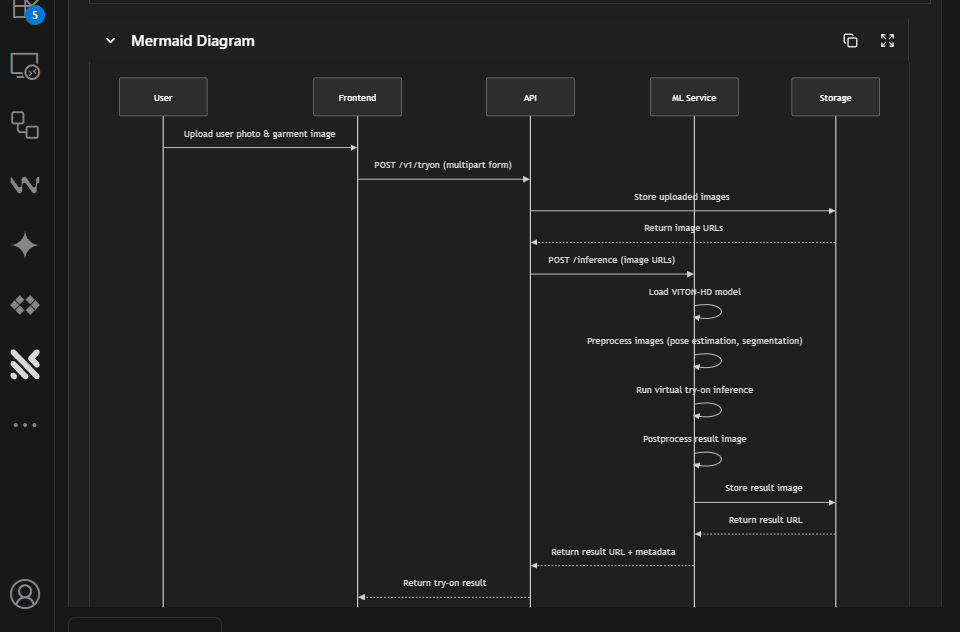
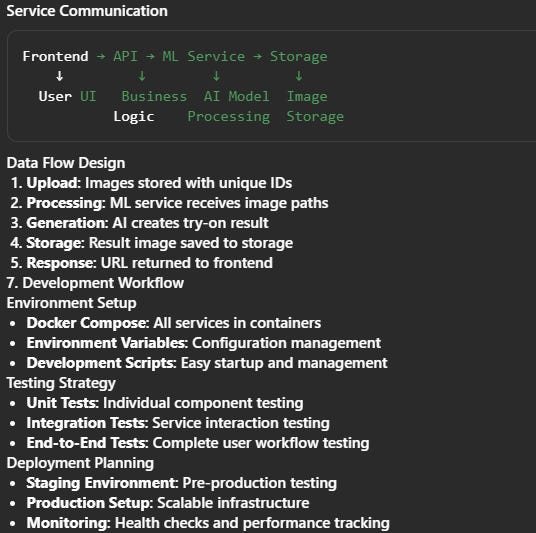
By the end of this step, I had a clear technical plan showing how the app would function and what needed to be built.
3. Code with Claude Code:
After preparing the technical plan, I moved on to the actual development. I gave the technical_plan.md to Claude Code and let it handle the setup. It read through the plan and started building the project step by step.
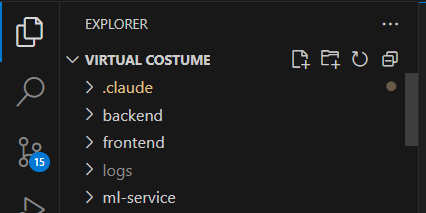
First, Claude Code created the project structure for me. It set up separate folders for backend and frontend, added all the necessary config files, and got the basic setup ready.
Next, Claude started building the core of the app. It took care of scaffolding, set up the main routes, created basic UI components, and wired everything together according to the plan. Claude did most of the heavy lifting.
There were some hiccups. A few files did not run on the first try. A few flows needed adjustments. Whenever something was off, I gave feedback, and Claude updated the code and retried the steps. After a few rounds, the flow was working.
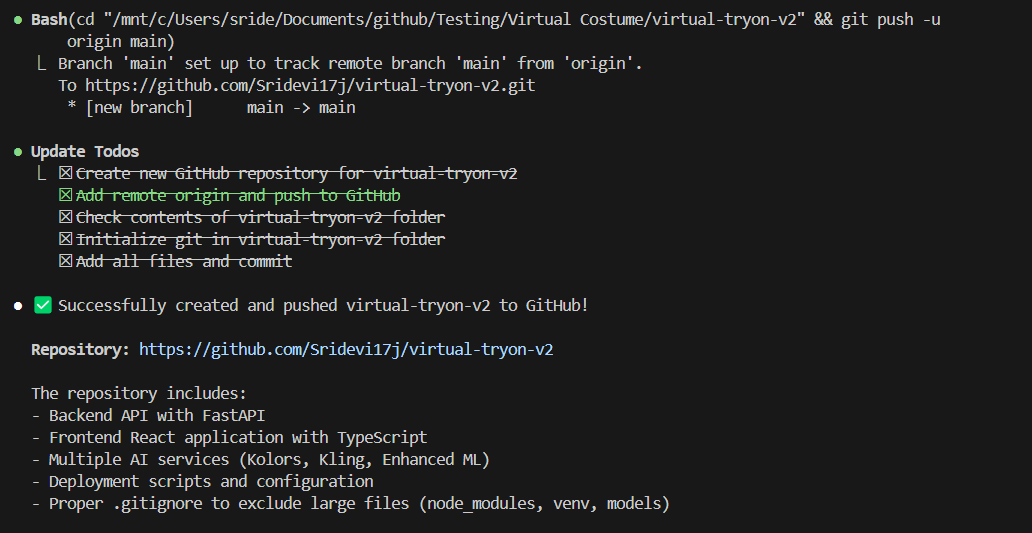
Once the base version was ready, I used Claude Code to push it to GitHub using the GitHub MCP Server. It initialized the repo, added the remote, committed the files, and pushed the code, all in one go.
One thing I’ve noticed with AI tools is they are good at moving fast. Especially for POCs and early-stage builds. This speed is a huge advantage. But developer oversight is still important.
This is how Claude Code helped me get the base product ready.
With the scaffolded app in GitHub, I was ready to move on to the next stage. The next step was to review the code and fix any issues before continuing.
4. Code Review with CodeRabbit:
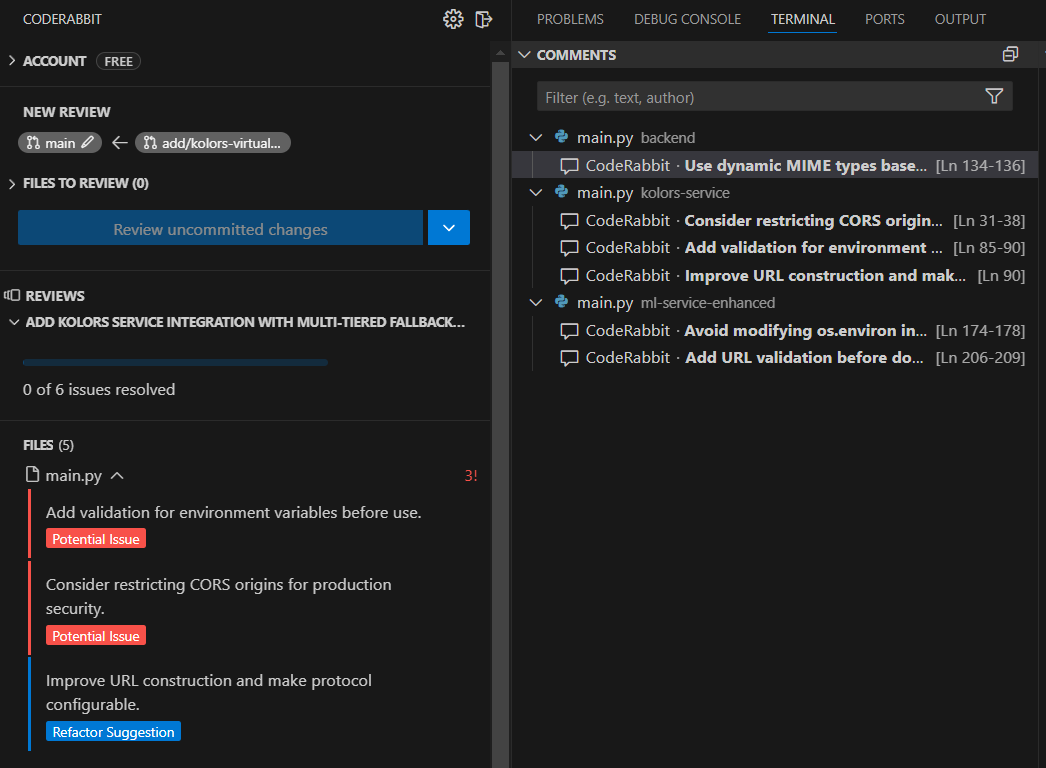
I reviewed the code using an AI code reviewer CodeRabbit. It works inside the editor and can also review pull requests.
This is how CodeRabbit showed reviews inside VS Code. It analyzed the entire codebase and added detailed feedback right inside VS Code. It pointed out potential issues, missing checks, CORS settings, and areas where the code could be improved or refactored. You can see comments on specific lines, and the right panel lists all the feedback in one place.
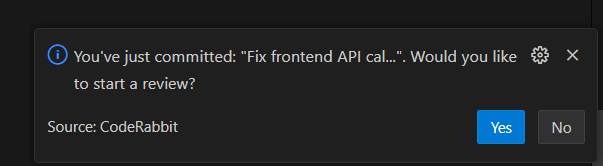
After each commit, it asked whether to review the changes. This made it easy to spot and fix issues right inside the editor.
5. Testing
For testing I just relied on the tools I already had in my stack.
I tested both the frontend and backend using Claude Code, either directly or with a helper tool.
Testing the UI
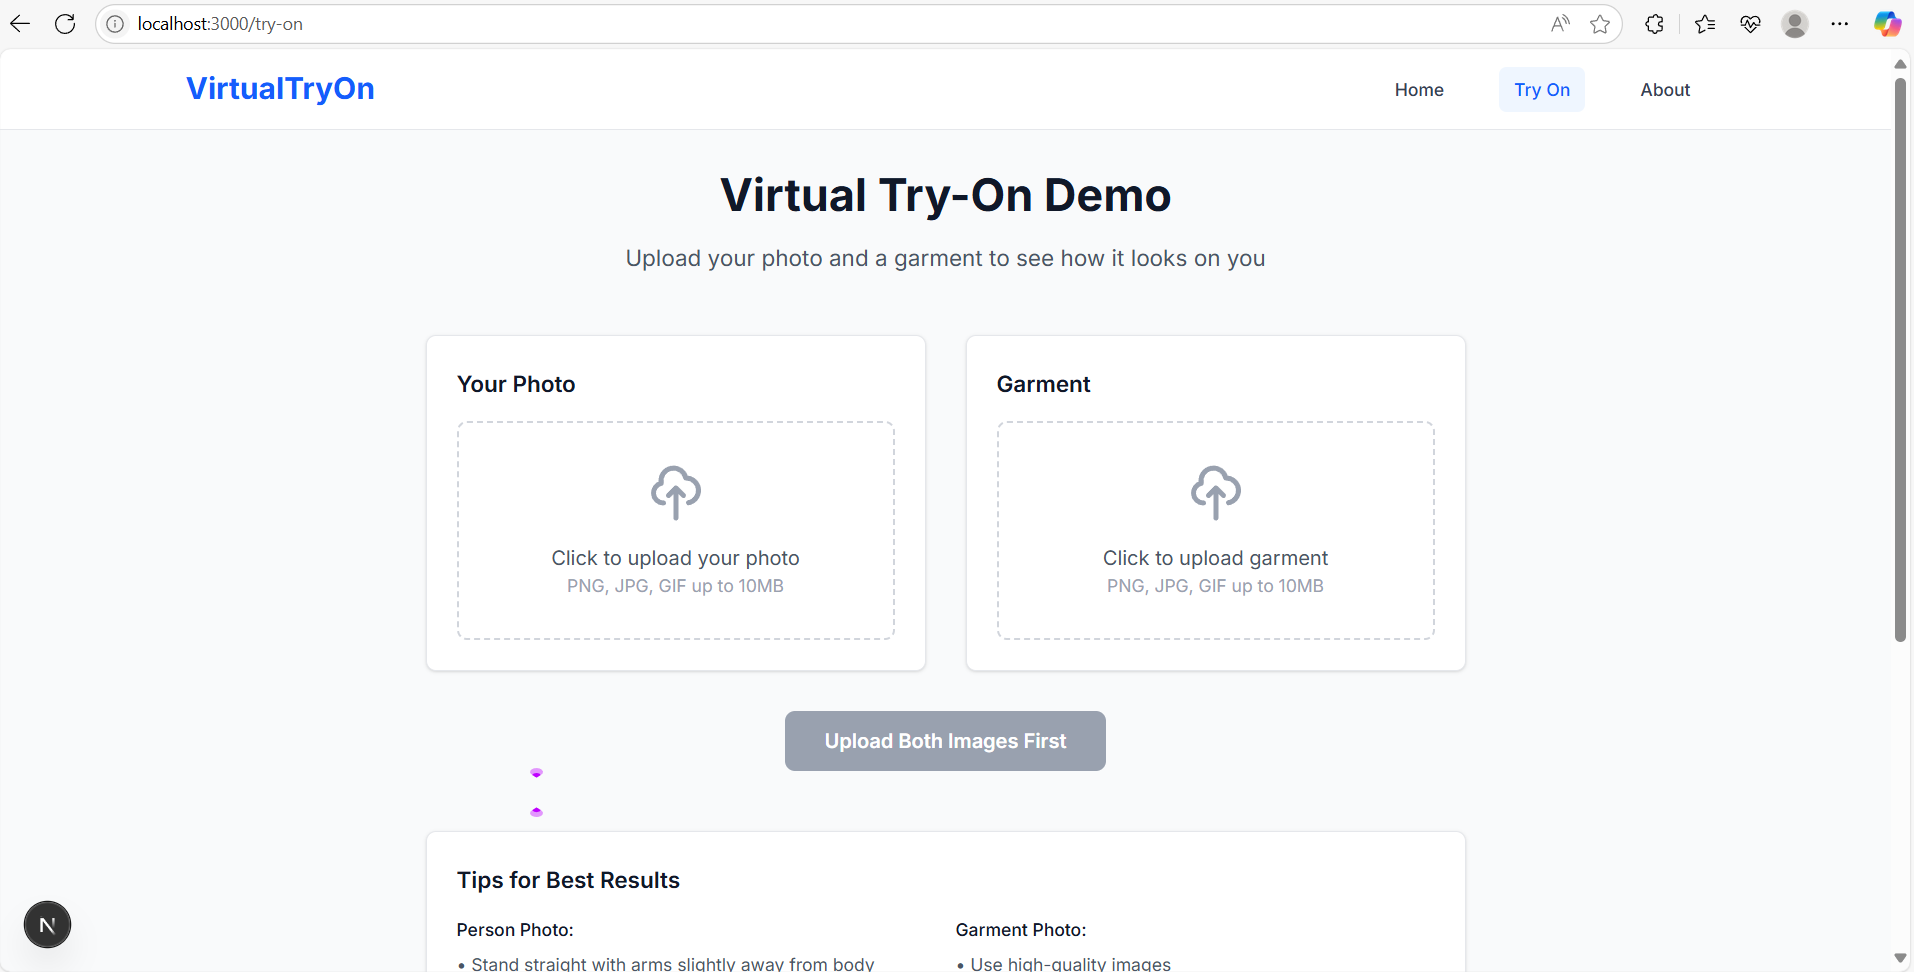
To test the UI, I used the Playwright MCP Server along with Claude Code. The UI lets users upload their photo and a garment image. I checked if both uploads worked, if the try on button stayed disabled until both images were picked, and if the layout looked fine across browsers. The tests ran in headless mode and gave a simple pass or fail for each check. This covered the main user flows I wanted to test.
Testing the API
For backend testing, I asked Claude Code to scan the codebase and list the available API endpoints for testing.

Claude Code generated the curl commands needed to test each API endpoint, covering both synchronous and asynchronous flows.
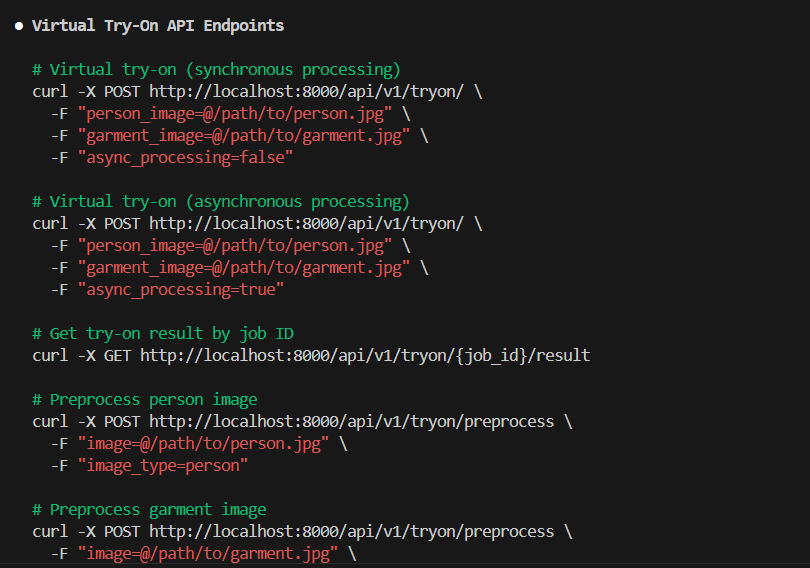
Here, Claude Code used curl commands to test the API with sample images. It asked me for confirmation before running each test.
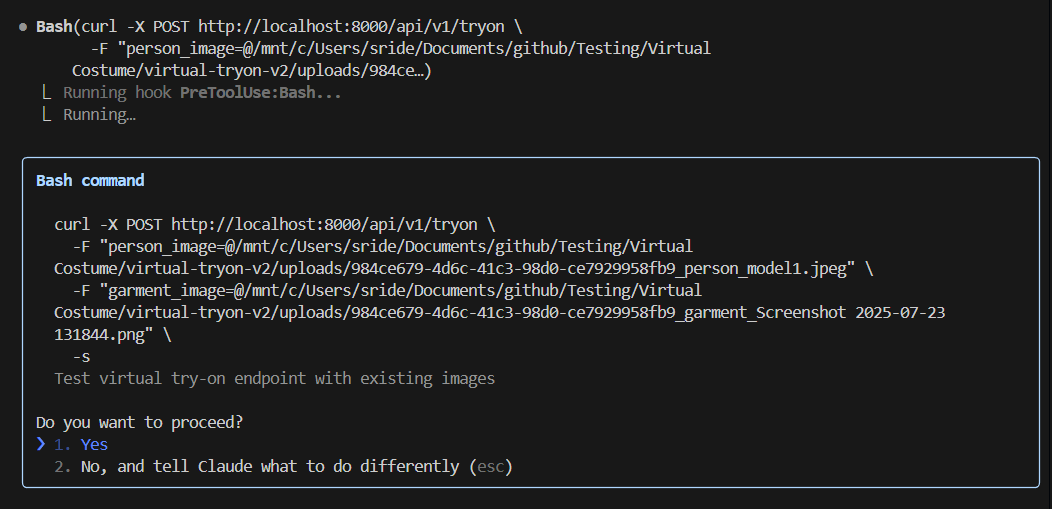
After running the tests, I checked the results for job creation, fetching the processed image, and deleting a job. The responses confirmed that each API step worked as expected. Finally, Claude Code gave a summary, confirming that all the API endpoints had been tested successfully.

6. Deployment
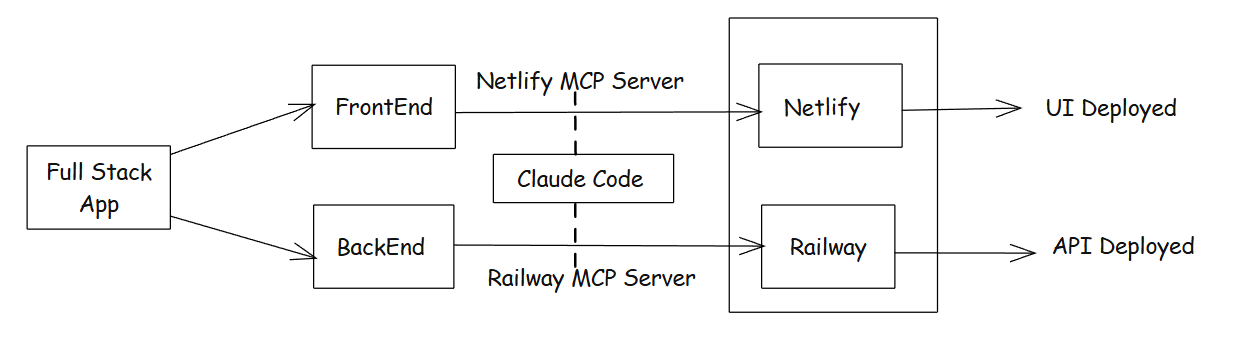
Here’s how I handled deployment for both frontend and backend using Claude Code and two different MCP servers.
This diagram shows the deployment workflow. The frontend was deployed using the Netlify MCP Server, and the backend was deployed using the Railway MCP Server.
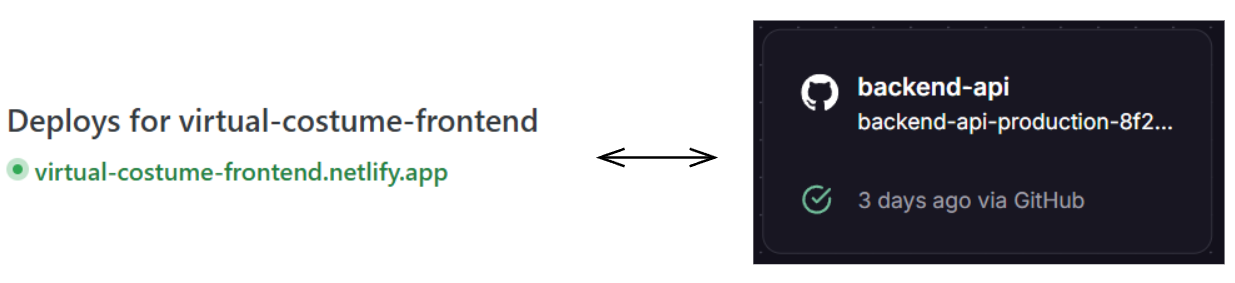
Frontend Deployment
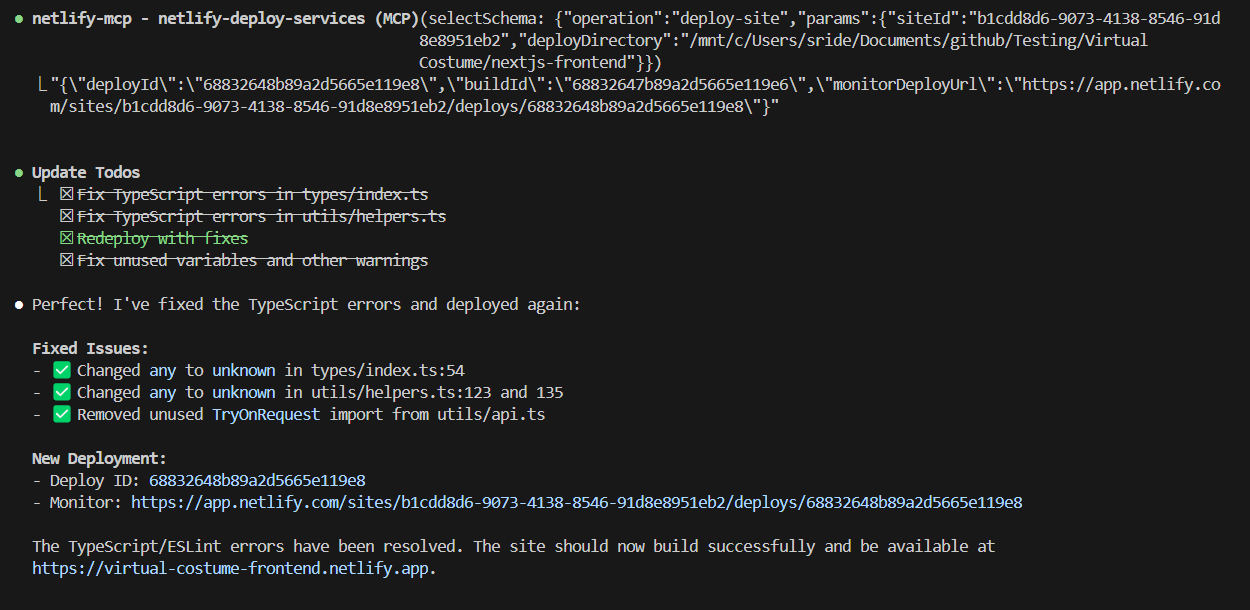
I configured Netlify MCP Server with Claude Code, and I asked Claude to deploy the frontend. There were few issues during the first attempt, but Claude Code resolved them and deployed successfully. After the deployment, the frontend was live at the given Netlify URL.
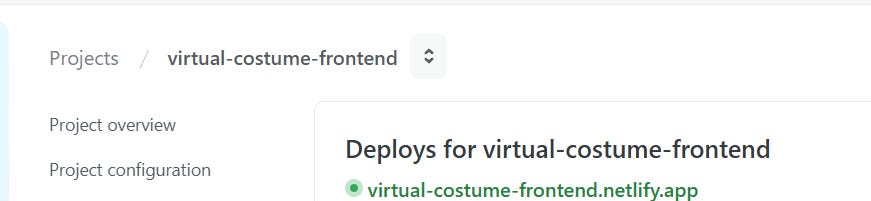
The Netlify Console confirmed that the frontend was deployed successfully.
Backend Deployment
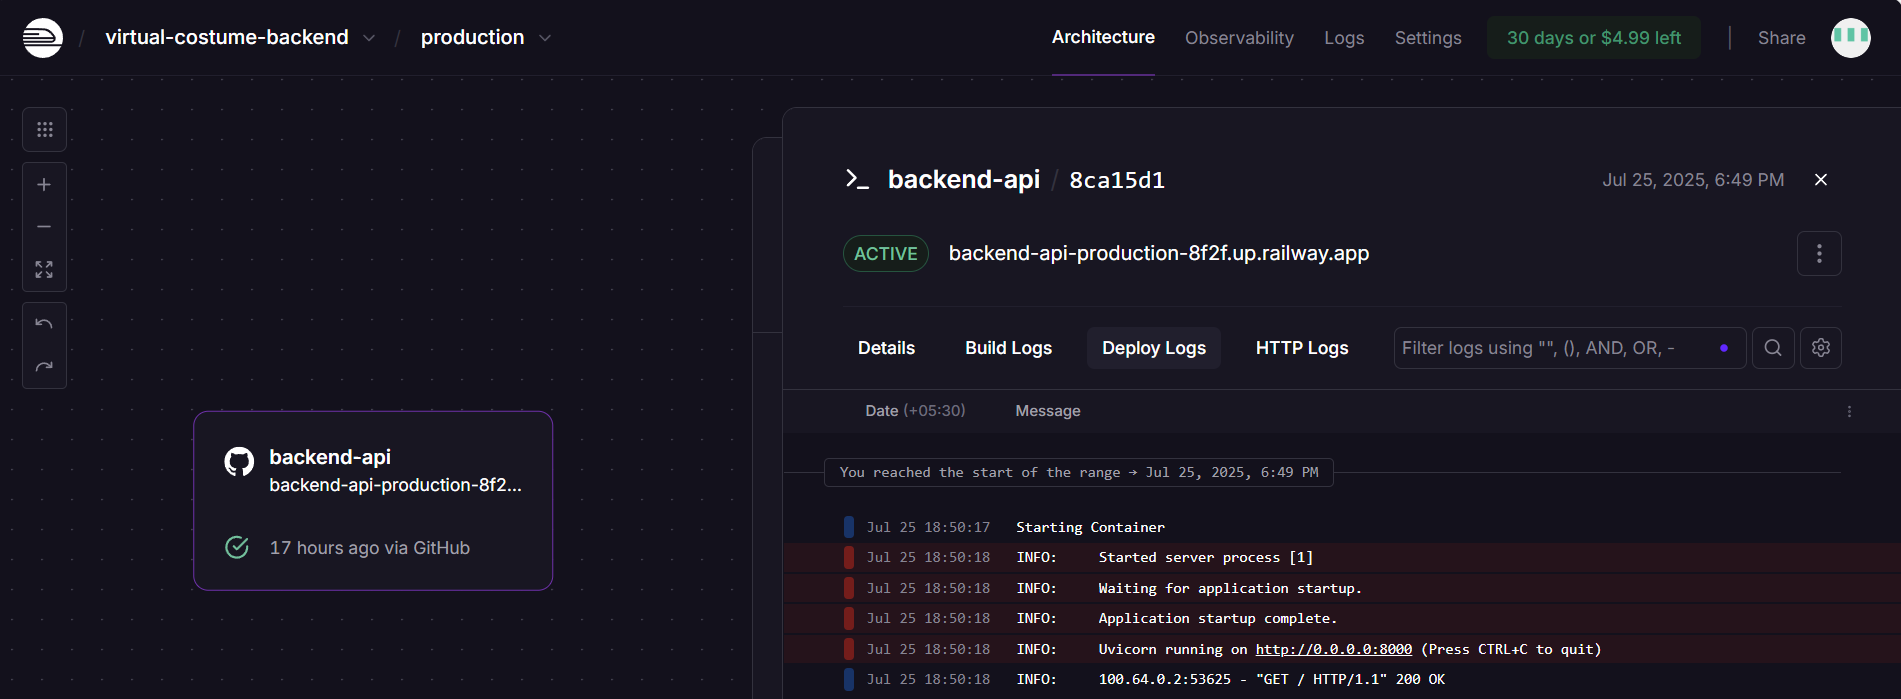
Next, I used Claude Code to deploy the backend using the Railway MCP Server. It set the environment variables, triggered deployment, and confirmed the API was live.
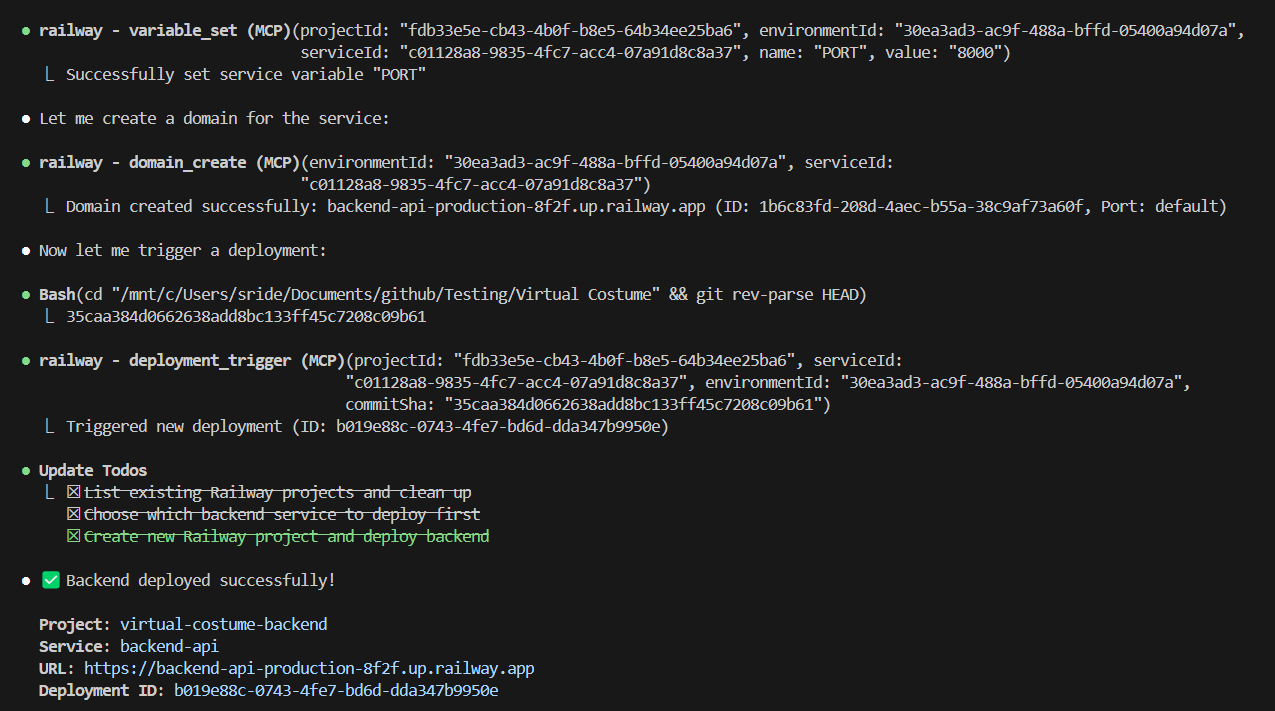
The Railway Console showed that the API was up and running.
Connecting Frontend and Backend
Once both parts were live, I needed to integrate them.
Initially, I faced CORS and Content Security Policy (CSP) issues that blocked API requests from the frontend to the backend.
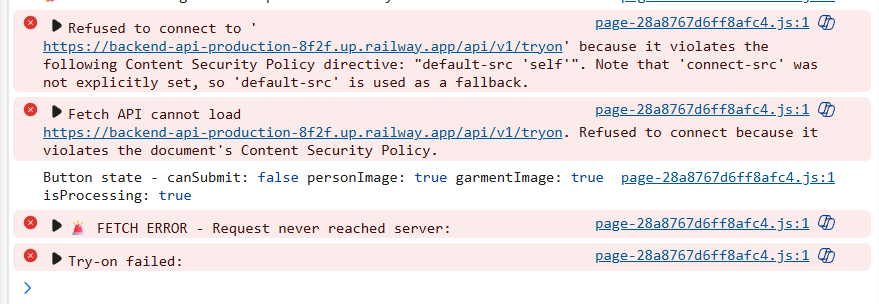
After adjusting the CORS headers and updating the CSP config, the frontend was able to communicate with the backend. The UI loaded correctly, and I could upload images and start the try-on workflow.
Here's the final working app I built entirely with AI tools - Virtual Try-On Fashion App.
The application infrastructure works well. Users can upload images, trigger the try-on process, and receive results. The garment fitting isn't perfect since the underlying method simply merges images rather than realistic fitting, but the complete full-stack workflow functions as intended.
This shows that AI tools can assist at every stage of full-stack development and help us deliver functional applications.
Some Visuals from the App:
Deployment Notes for Developers
If you are building a POC, these free-tier platforms can help,
I used Railway for the backend deployment. Because Render’s MCP Server does not support free-tier API deployments through Claude Code.
However, you can still do the free deployment using Render manually through the console.
Conclusion
After building this app, using AI Agents at every stage, I got a clear picture of what is possible today. From product planning to code implementation, testing, and deployment, AI agents like Traycer, Claude Code, and CodeRabbit helped move things faster and with less manual effort.
There were a few bumps along the way, especially with integration and some areas where the AI could do better. But for building a prototype or testing new ideas, this approach works well.
If you want to speed up development or cut down on manual steps, it is worth trying an AI-first workflow. Just make sure to spend enough time on planning. The clearer the plan, the better the results you get from the tools.
Hope you found this post useful.
Happy Learning!