

Anthropic released Claude Opus 4.5 recently. It is their strongest model so far.
I have been using it inside Cursor for a few weeks. Opus 4.5 handled the coding work with ease. Cursor managed the agents and kept them running side by side. Together they cut my build time almost in half.
My iteration cycle changed as well. Most tasks worked on the first try. When something failed, the fix was fast. Less back and forth. More time to build.
This guide captures my workflow with Cursor and Opus 4.5 while building a real time application.
What we will cover
Claude Opus 4.5 features
Cursor’s latest features
A developer workflow with Cursor and Opus 4.5
What I noticed in the code while using Opus 4.5
Cursor with other models
Let us start.
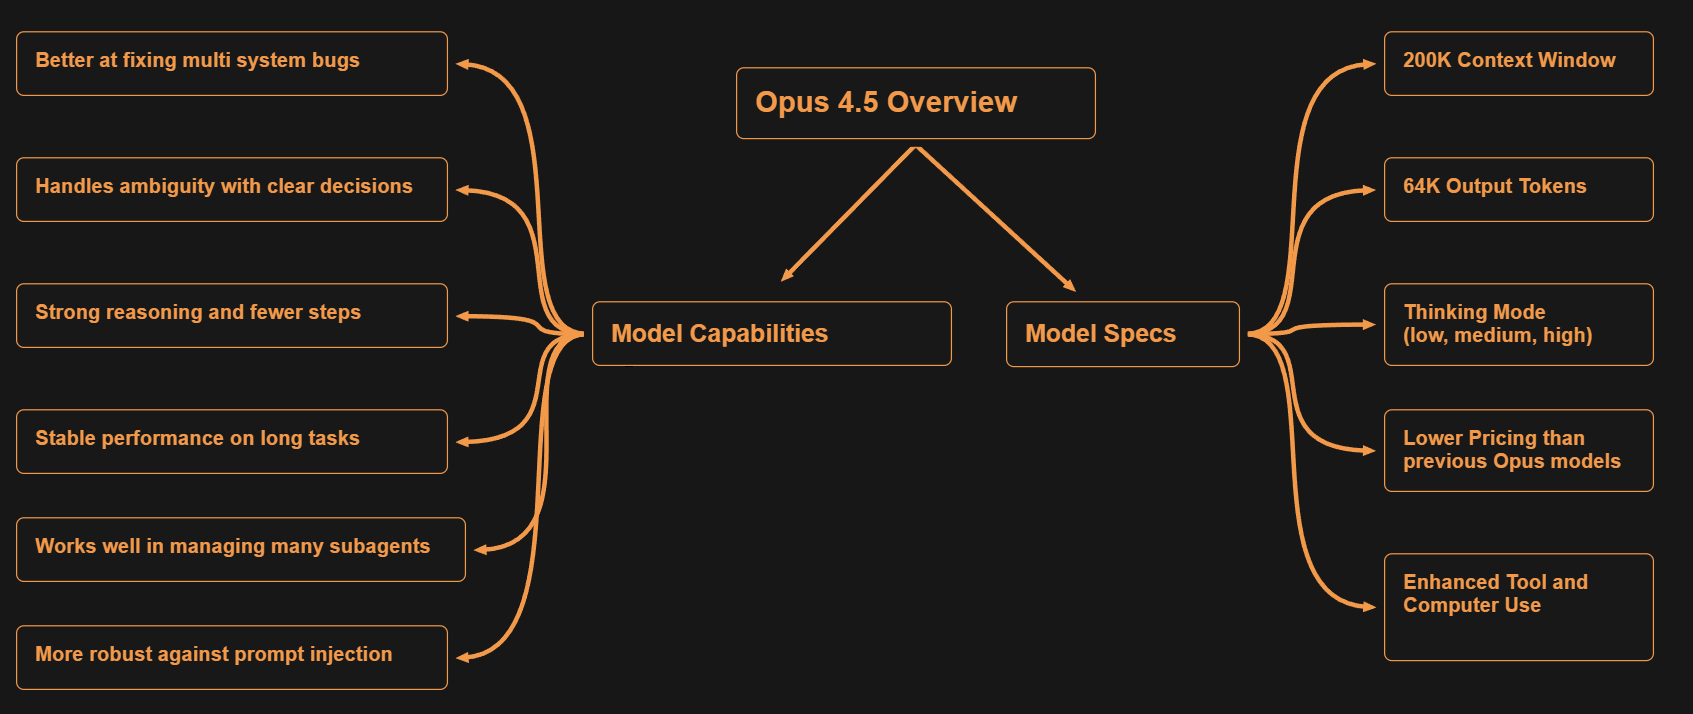
1. Claude Opus 4.5
Here is a quick view of what Opus 4.5 offers. I grouped the model spec and the capabilities so you can see both sides at once.
Opus comes with its own strengths, but it is not the best choice for every task. Other models perform better in some areas.
When it comes to multilingual tasks, Gemini performs better than Opus. For visual tasks, GPT takes the lead.
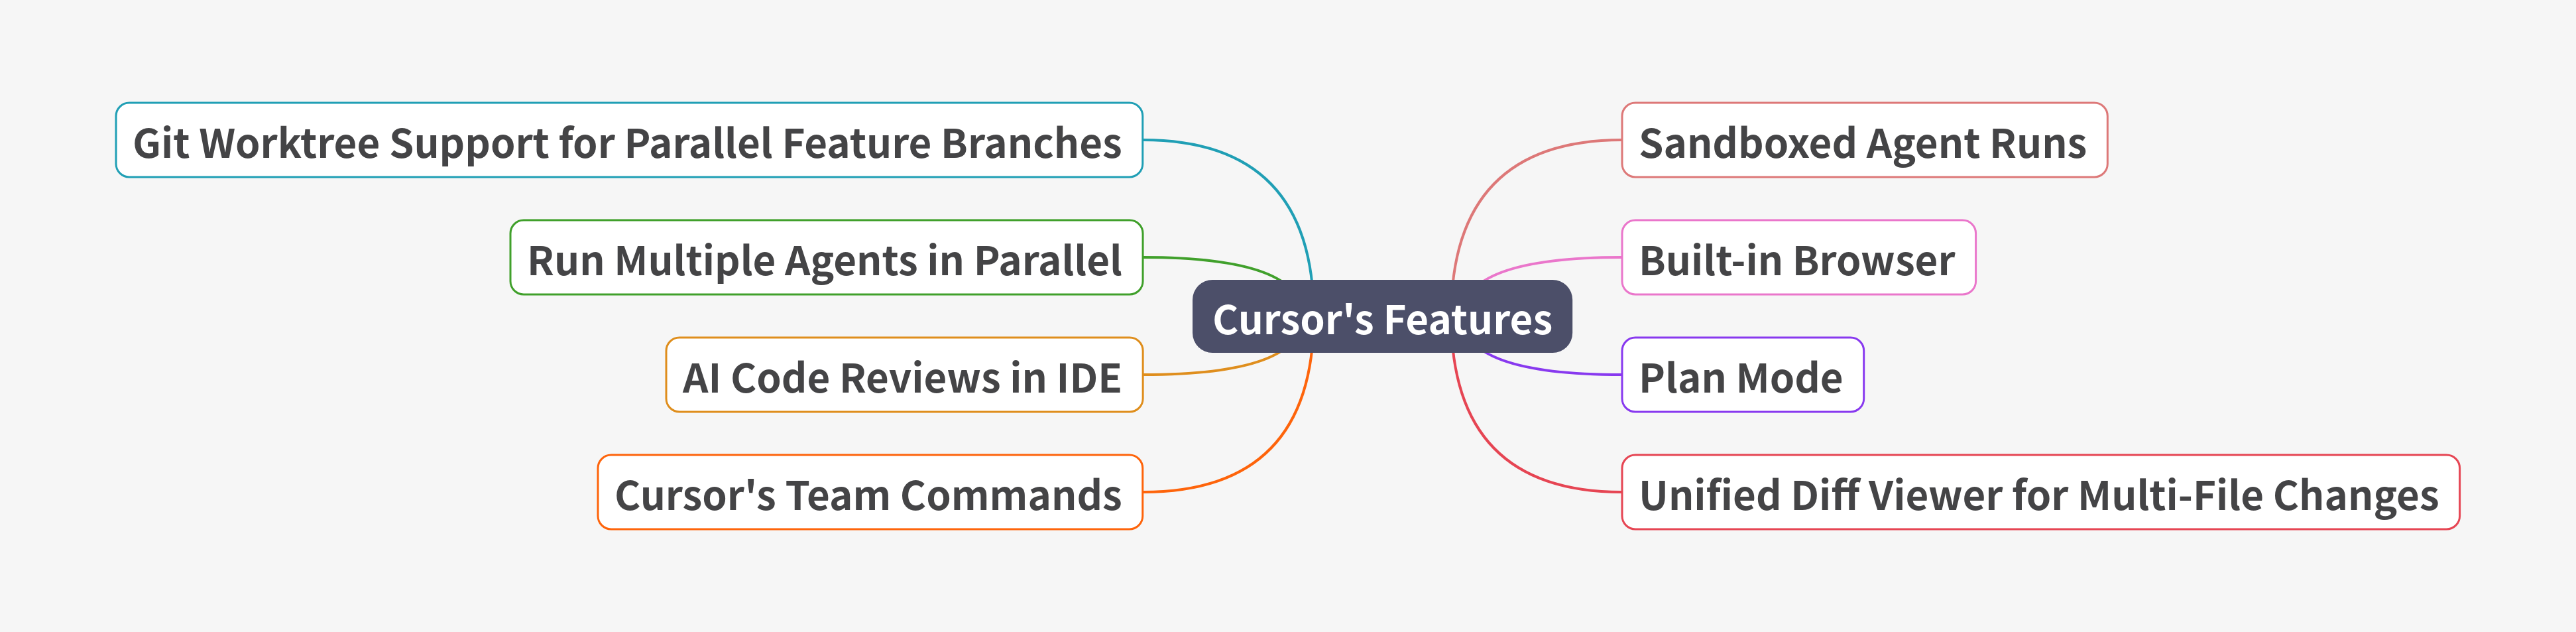
2. Cursor Features
Here are the Cursor features that helped the most during the build. I grouped them so you can see how all in one place.
Both tools bring their own strengths. When used together, the workflow becomes faster and easier.
Here is the cursor + opus 4.5 workflow for building an application.
3. Cursor + Opus 4.5: The new developer workflow
The application I built is a small API monitoring tool.
What it does :- Captures all API calls from my local apps and shows them in a clean UI.
Why I built it :- DevTools works, but shows everything like network requests, console logs, DOM changes. Too much noise when I just want to see API calls.
How it helps :- Clean view of only API requests and responses. No clutter. Makes debugging faster.
I will start by pre-cursor setup.
Step 1: Pre-Cursor Setup
mkdir api-monitor-demo
cd api-monitor-demo
git init
cursor .
Step 2: Set Up Rules Before Writing Code
Cursor supports rules. These rules act like project standards. Once you set them, Cursor follows them whenever needed.
There is a Cursor rules repo on GitHub with examples for many languages.
I copy the rules and send them to an agent. I ask the agent to create the rule files. I keep sending prompts for creating rules for both frontend and backend. Cursor queues the messages and completes each task one by one while I plan the rest of the work.
Create Rules Folders and Files
Prompt to the Agent:
Create .cursor/rules/ folder
Create core.mdc inside
.cursor/ruleswith below content.Create backend.mdc inside
.cursor/ruleswith below content.Create frontend.mdc inside
.cursor/ruleswith below content.
Sample content for core.mdc
---
description: Core project standards
globs:
alwaysApply: true
---

# Standards

- TypeScript strict mode
- Never use `any` — use `unknown` and narrow
- Never write `// ... rest of code` placeholders
- Always provide complete implementations
- Use Zod for runtime validation
- Log errors with context: `console.error(’[Component]’, error)`
Start with a few rules. Add more only when you see repeated mistakes. Keep the tab open and update it as you build.
Step 3: Plan with Opus 4.5 (Use Commands for Planning)
Cursor has an Ask Mode for read only conversations. It answers questions but does not touch the code.
I used Ask Mode at first, but I often forgot to switch back to Agent Mode when I wanted to make code changes. Then I had to repeat the prompt in Agent Mode.
To avoid this, I use a small planning command. I run this command in Agent Mode, but it does not make any code changes.
Create a file at .cursor/commands/planonly.mdc with this content:
#planonly.mdc

Do not update any code. Instead:
- Explain the approach
- List options with pros and cons
- Highlight potential challenges
- Ask clarifying questions if the request is unclear
- Respond based on prompt
This works like a clean planning mode inside Agent Mode. I use it when I want Cursor to think through the problem without touching the repo.
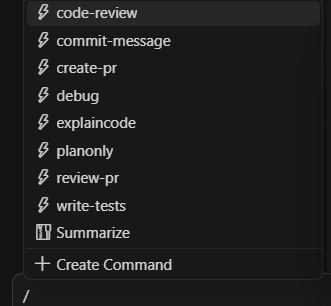
Cursor gives a few example commands on its page. You can create your own commands based on your workflow.
I keep a small set of commands that I use often.
For any new project,
I think through the design with Opus first. Once the design is clear, I ask it for the detailed prompts to build the frontend and backend.
Opus works like a prompt builder in this stage.
Since it knows the full context, it gives detailed prompts for each part. I paste them into different agents, and they start to build in parallel.
Step 4: Building the app with cursor parallel agents
Once I had the prompts from Opus, I sent them to separate agents.
This is where Cursor and Opus change the way we build. Instead of working on one part at a time, you can run many agents in parallel. Each agent focuses on a single part of the project.
For this app, I used three agents: frontend, backend, and infra.
Backend Agent:
Prompt:- Build the backend proxy server in src/server/ with these requirements:

[backend requirements here]
Frontend Agent
Prompt:- Build the React UI in src/ui/ with these requirements:

[frontend requirements here]
Infrastructure Agent
Prompt:- Set up project infrastructure

[infra requirements here]
All three agents run at the same time. This is the folder structure I got for the API monitoring app.
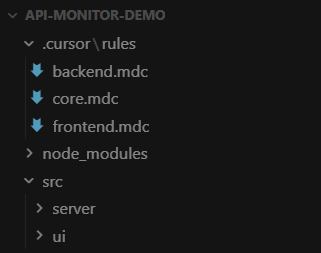
Watch three agents build the API Monitoring app in parallel. Backend, frontend, and infrastructure - all at the same time

The API monitoring tool was a small project built locally from scratch, so running all agents in the same folder worked fine.
But in bigger projects and git repos, the number of files and changes grows, and conflicts become more likely. This is where git worktrees help.
Working with existing GitHub repo
Git worktrees let you work on multiple branches at the same time. Each agent gets its own workspace. No overlap. No risk of one agent overwriting the work of another. Also, multiple feature development can be done at the same time.
In that case, I start by creating feature branches with git worktrees.
git worktree add ../ui -b feature/ui
git worktree add ../api -b feature/api
I open each worktree in its own editor window. Then I ask Opus to read the code and understand the repo. Then each agent starts to work in its own folder.
When the work is done, I merge the feature branch back into main. Cursor shows the diffs clearly, and the review tools help catch mistakes before the merge.
Code review
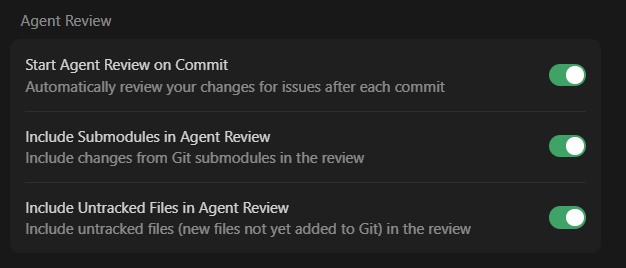
Cursor has a built-in review flow. It helps you check the changes made by the agents. It shows a simple diff, and you can choose which changes to accept.
Cursor can review after each commit, include untracked files, or include submodules.

You can also create a command for code review and use it in chat.
You can also use tools like Coderabbit AI to review your code inside IDE.
4. What I noticed in the code while using Opus 4.5
Here are some things I noticed in the code while using Opus 4.5.
Handled complex logic without breaking the flow
Delivered clean code in a single prompt in many cases
Kept the structure stable across long tasks
Produced modular and efficient code by default
Wrote clear and consistent UI components
Created well-structured API endpoints
Used predictable naming and patterns across files
Generated self-explanatory code that needed fewer comments
5. Cursor with other models
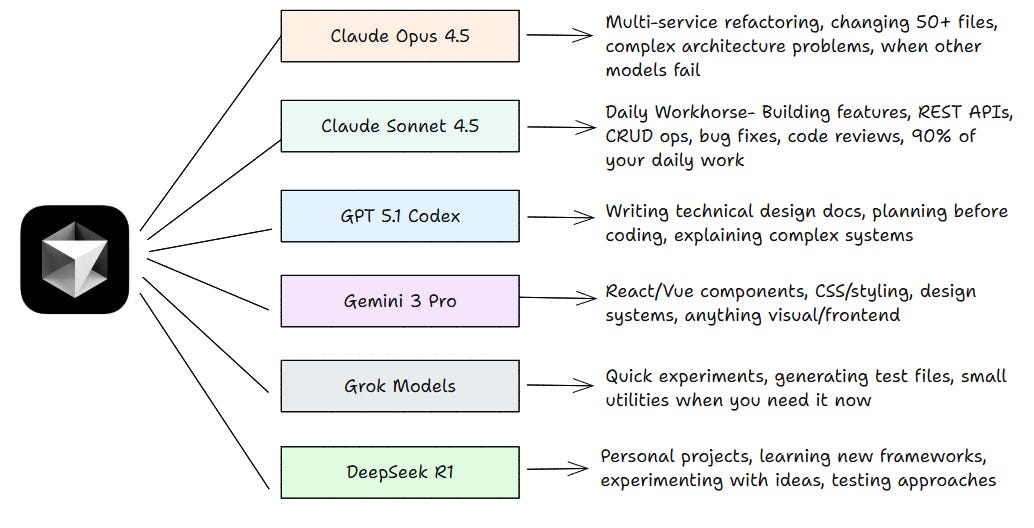
After working with cursor for many months, I switch between models based on the kind of work I am doing. Each one has a strength.
Conclusion
We looked how Cursor agents with Opus 4.5 help speed up development. If you are using Cursor, try with agents - Opus 4.5 and git worktrees. It keeps the work organized and makes it easy to build features in parallel.
This setup is not about changing everything you do. It just gives you a smoother way to move through your work.
Next time you start a project, try this: Open parallel agents. Give each one a clear task. Let them run while you plan what’s next. You’ll finish faster than you expect
Happy Learning!