

Developers always like the command line.
There’s just something about typing on a black screen. It feels more real and comfortable. Maybe that’s why dark mode is everywhere, from docs to IDEs.
Since developers spend most of their time in the terminal, it makes sense that AI agents are coming there too.
CLI Agents are growing fast. They help with coding, reviews, and all code related tasks, right inside the terminal.
In this blog, I will cover,
What are CLI Agents
Popular CLI Coding Agents
How CLI Coding Agents work
A closer look at Claude Code
An overall comparison of CLI agents
How to choose your CLI Agent
1. What are CLI Agents
CLI agents are AI tools that run in the terminal. Most of them are coding agents. They understand your codebase, write code, fix bugs with natural language prompts. These tools run as shell commands.
Terminal AI agents interact with your codebase through an LLM.

2. Popular CLI Coding Agents
There are several CLI agents out there. Each one works differently.
The three leading AI providers have their own CLI agents.
Gemini CLI and Jules from Google
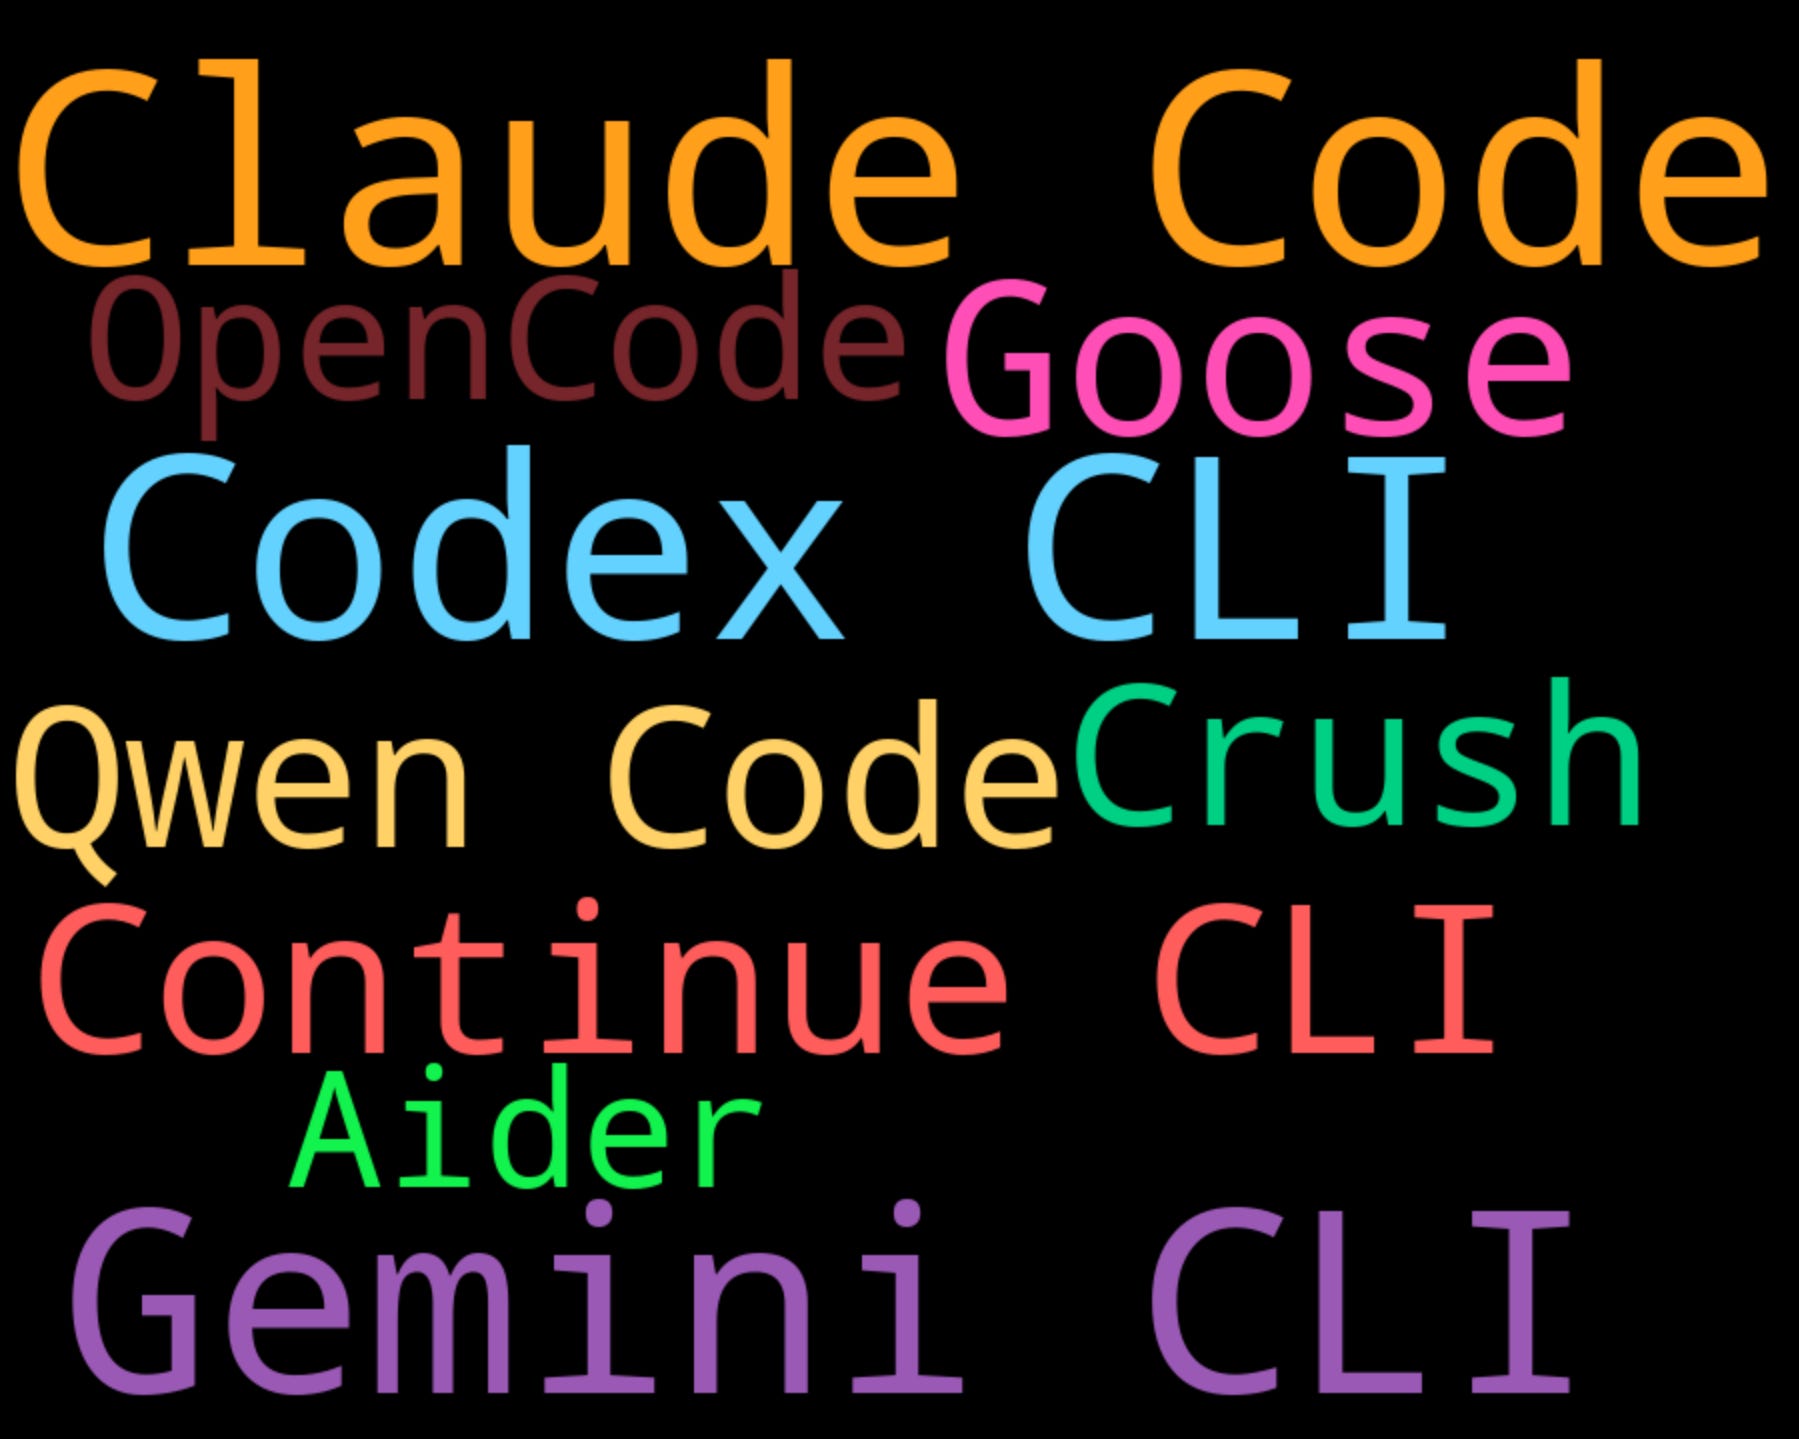
Alongside them, the open-source community has been very active. Developers are building their own CLI agents.
3. How CLI Agents work
Let’s see what happens behind the scenes when you run a CLI agent in the terminal.
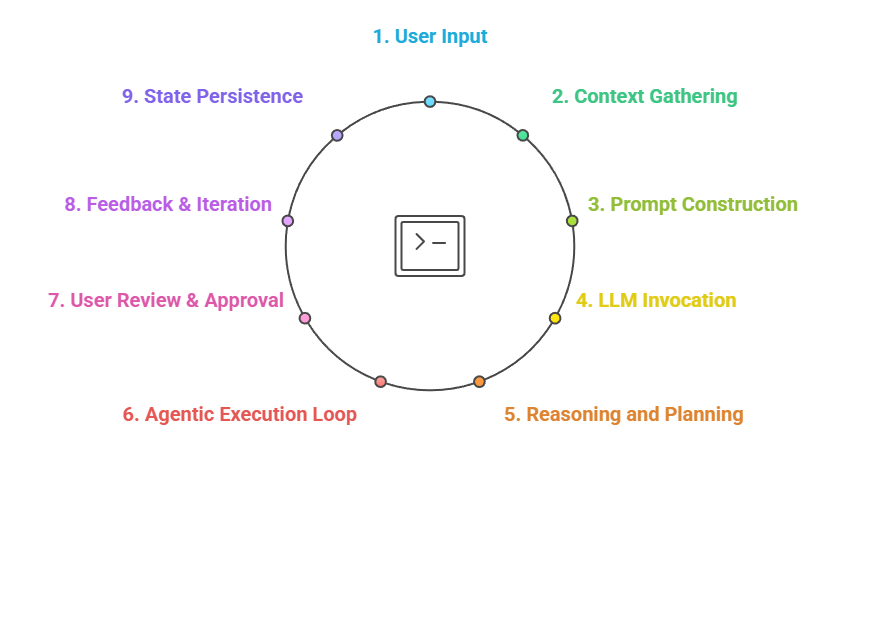
Step 1: User Input
You start by typing a command in your terminal. The agent reads it as plain text, for example: “add error handling to login function.”
Step 2: Context Gathering
The agent scans your workspace, reads your folders and files, checks your Git commits, and maps how everything connects. It also looks for files like AGENTS.md or README.md to understand your project.
Step 3: Prompt Construction
Next, it builds a detailed prompt for the model. The prompt includes your request, code structure, relevant files, recent changes, and coding rules. This prompt can be huge. Now LLMs can handle up to 1 million tokens.
Step 4: LLM Invocation
The agent sends this prompt to the LLM. It could be Claude, Gemini, OpenAI, or any open-source model. The model starts reasoning and streams the response back in real time.
Step 5: Reasoning and Planning
The model analyses the problem, finds the right files, and breaks the task into small steps. It decides which tools to use for reading, writing, or running commands, and then builds a clear plan before starting.
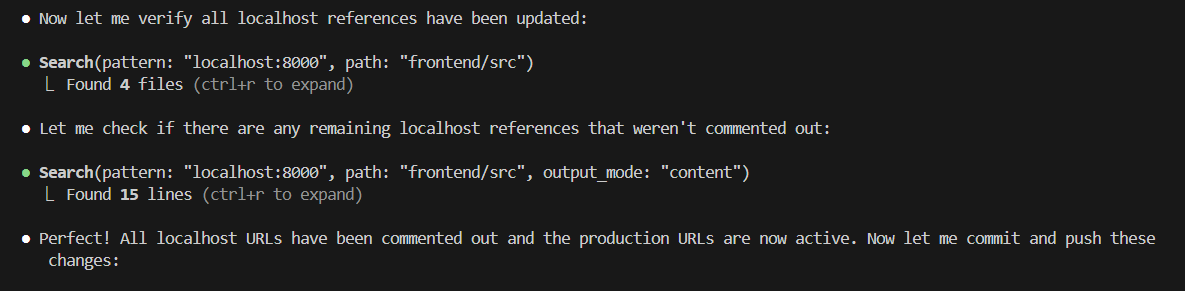
Step 6: Agentic Execution Loop
Now the agent begins the real work. It follows the plan, checks the results, and adjusts when something fails. It keeps looping through read, write, test, and fix until the code works as expected.
Step 7: Review & Commit
When done, the agent shows you the changes. You can review them line by line, accept or reject them, and even ask for tweaks. If you approve, it commits and pushes the change with a proper message.
Step 8: Feedback & Iteration
The agent learns within the session. If you prefer a different approach, it adjusts and improves. It is not training the model, but it remembers your context during the session.
Step 9: State Persistence
The agent saves your conversation, edits, and file changes. Some tools like Claude Code even offer checkpoints to revert to earlier stages or continue later from where you left off.

Now that we’ve seen how CLI agents work in general, let’s take a closer look at one of the best examples, Claude Code.
4. How Claude Code Works
Claude Code has always been my personal choice for coding. Let’s break down how Claude Code handles tasks step by step.
1. Agent Loop
Claude Code runs in a loop where it keeps calling tools until the job is done. Every task like reading, writing, or searching is done through a structured tool call.
2. Security Checks
Before running any command, Claude checks if it is safe. It uses smaller models like Haiku, to review shell commands and confirm they are not harmful. Once verified, it keeps a list of trusted commands for future use. This keeps your system protected from unwanted actions.
3. Scoped Edits
Claude works only inside the current project folder. It does not edit anything outside it, which makes the setup safe for local development.
4. Task Planning
Claude uses internal Todo tools to plan and track its work. It creates small subtasks, shows progress, and updates them in the terminal while it works.

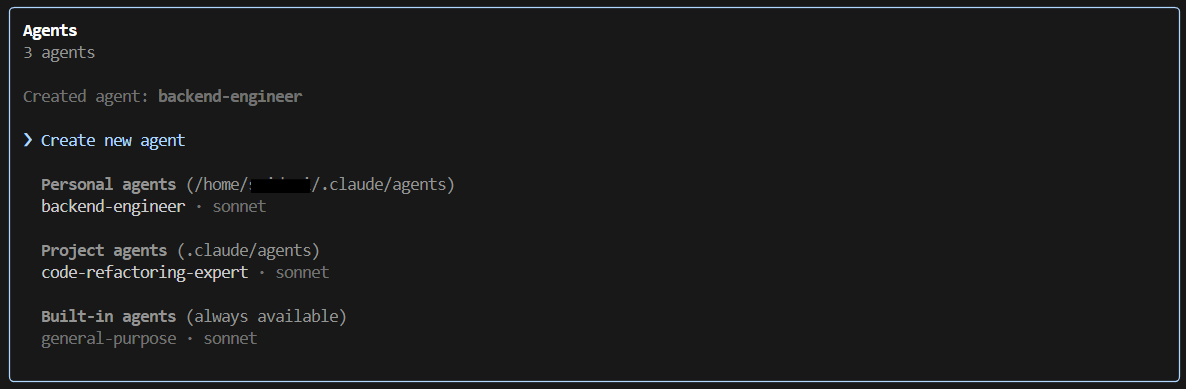
5. Sub Agents
When the job is complex, Claude creates small helper agents to handle parts of the task. Each one works in a small context and sends results back to the main process.
6. Prompt Rules
The system prompt keeps Claude Code clear and focused. It asks the model to stay concise, follow the existing code style, avoid random comments, and use tools smartly when needed.
You can find the system prompts for many AI tools in this System Prompt GitHub Repo.
7. Context Handling
When the chat starts to reach its limit, Claude summarizes old parts automatically. It keeps only what matters so it can continue reasoning without losing track.

8. Web Tools
Claude can fetch and search the web when it needs extra information. It even uses smaller models for these tasks to save time and cost.
9. Built on the standard Anthropic API
All calls go through the same Anthropic API that any developer would use.
Some details in this section are based on a Medium article that analyzed Claude Code’s internal workflow and Anthropic’s public API behavior.
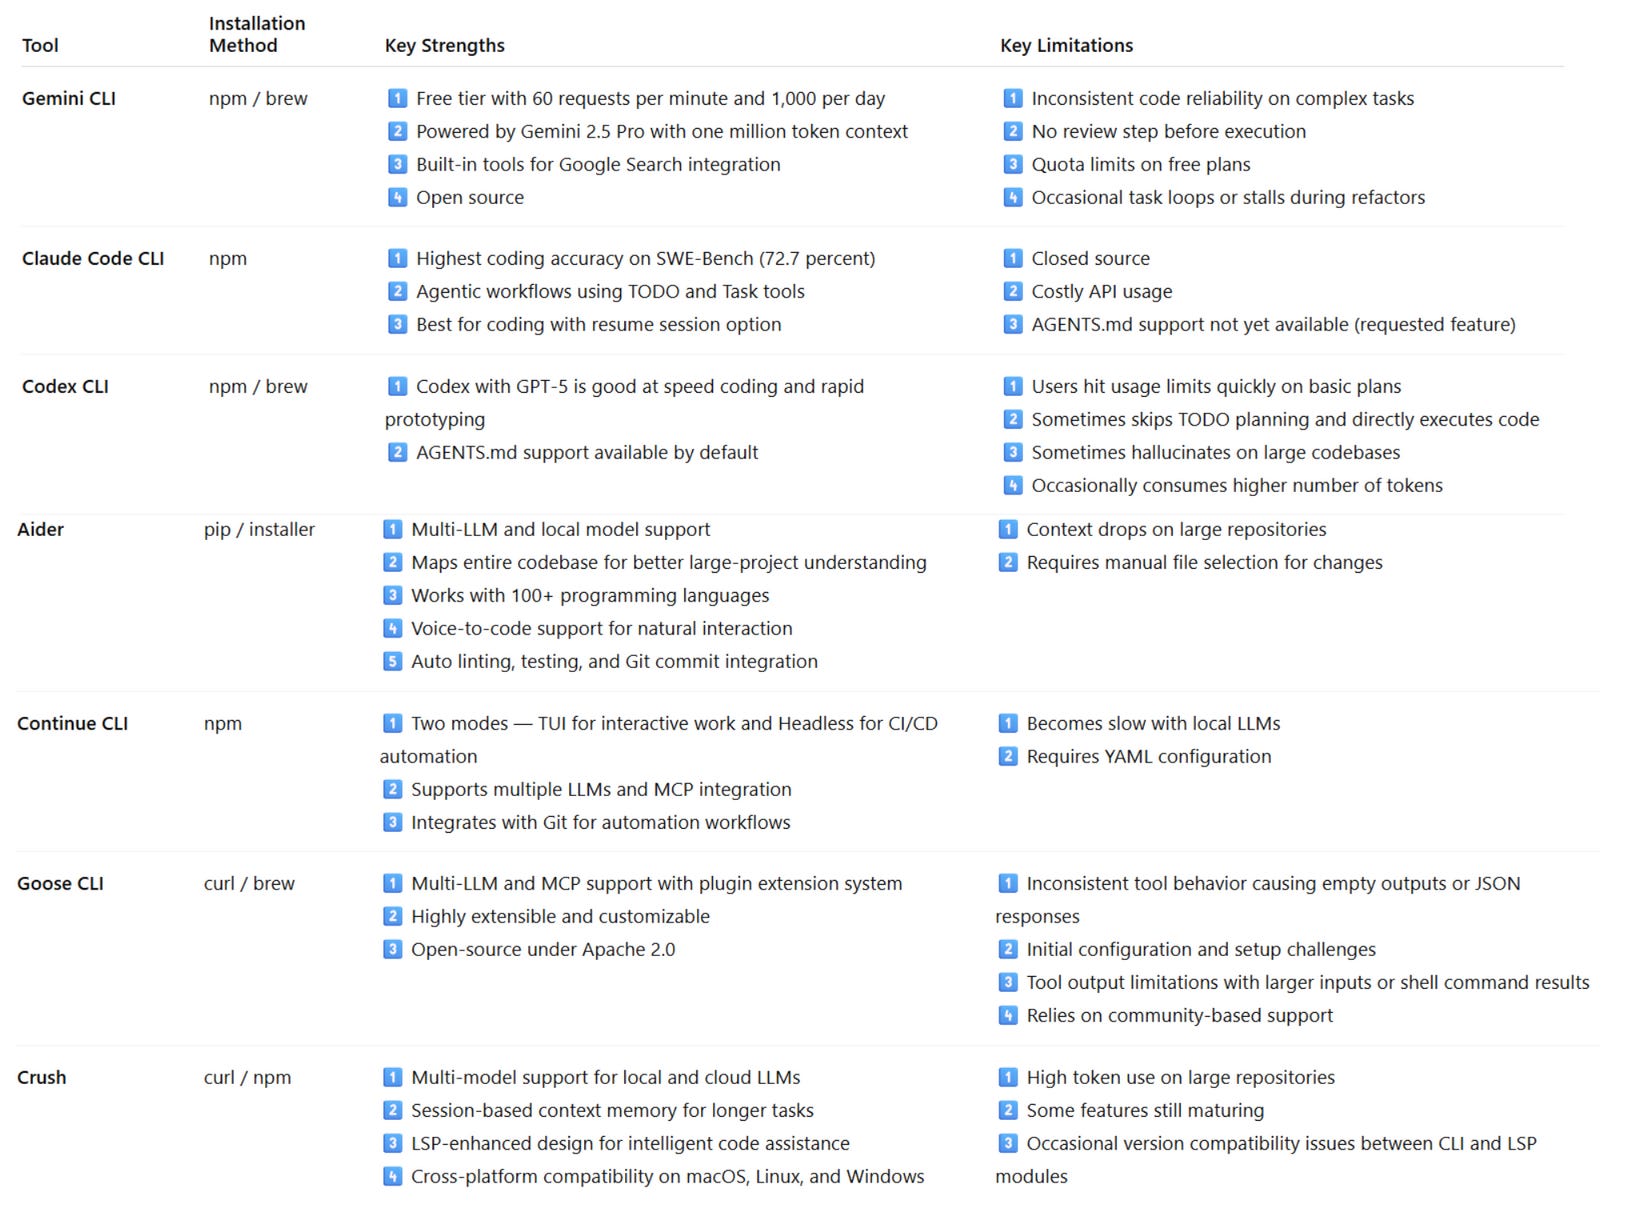
5. An Overall Comparison of CLI agents
Here’s a quick comparison of popular CLI coding agents. The table is based on insights from articles, community posts, and a few I tested locally.
6. Choose your CLI Agent
Here’s a quick guide to help you choose the right CLI agent based on your cost, privacy, and accuracy needs.
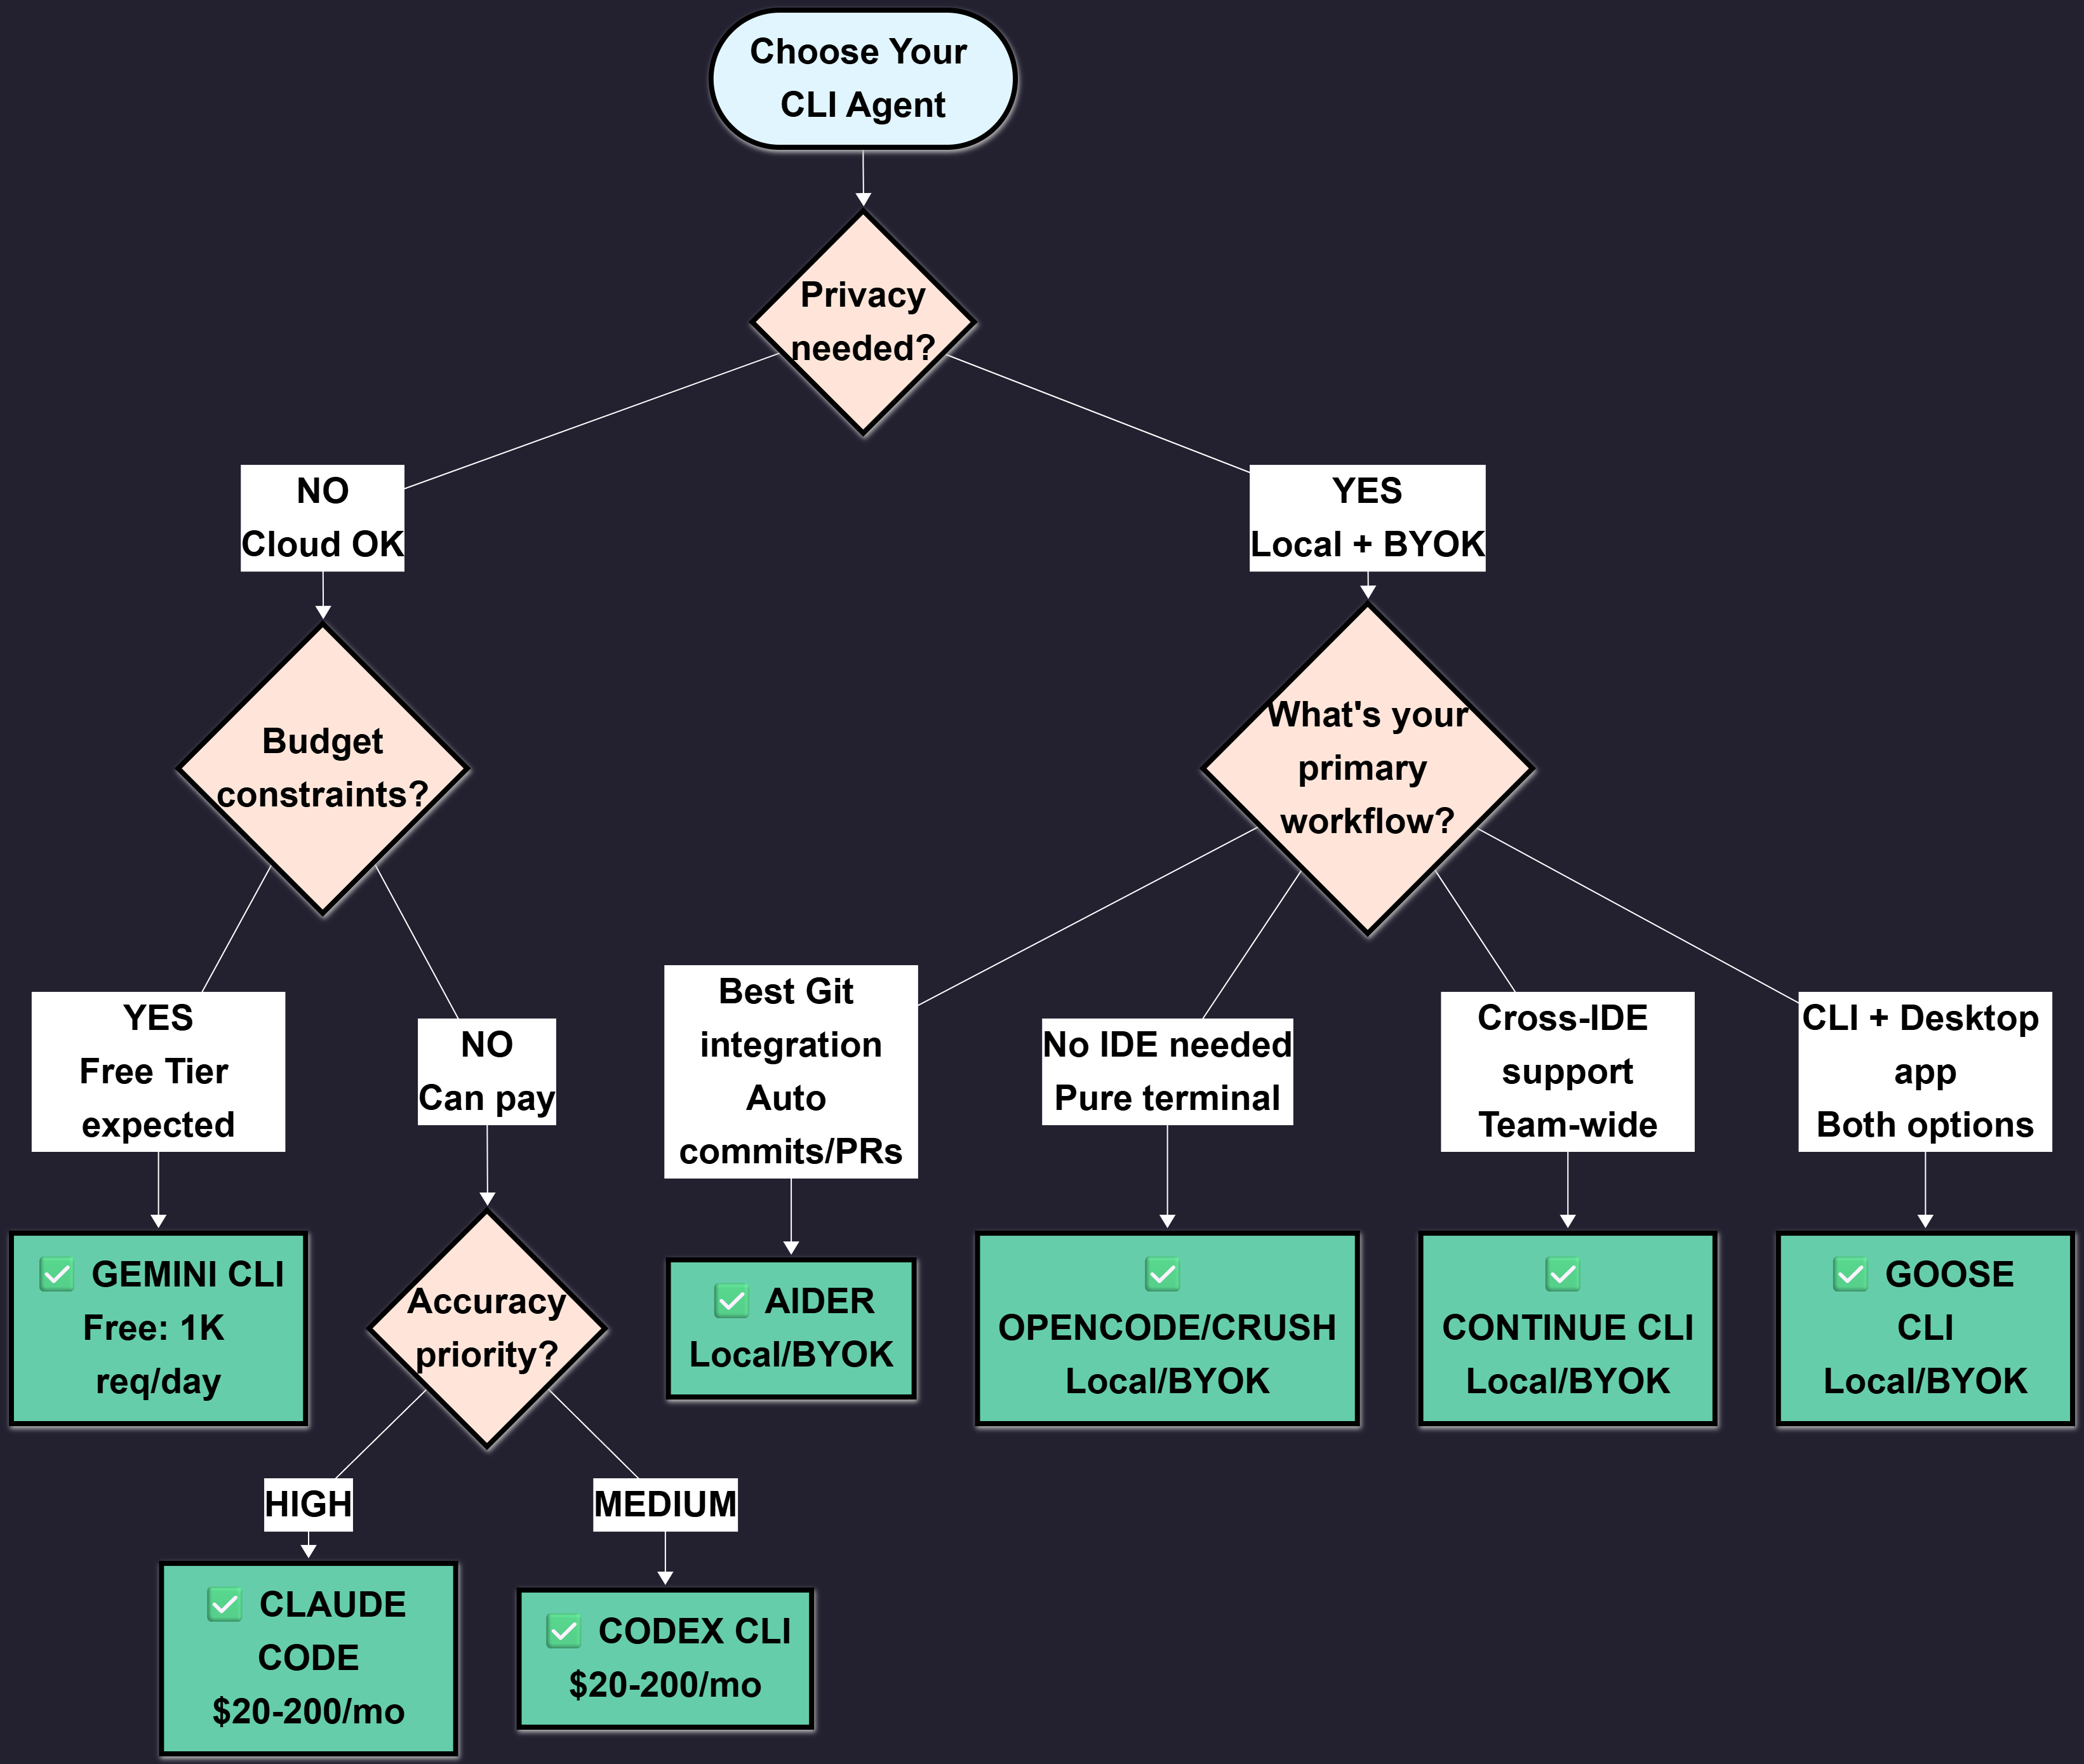
Each tool suits a different kind of developer. Choose the one that fits your workflow.
Conclusion
We explored how CLI agents work and why they’re becoming a favorite among developers. From Claude Code to Goose, each offers its own balance of accuracy, privacy, and cost.
If you spend most of your time in the terminal, these tools are worth exploring. Everyone will find an agent that fits their workflow best.
If you’re already using one, I’d love to hear how it helps you code better.
Happy coding!
I really like Meer CLI I think it’s promising project